How to Setup Logging in Automation System
Introduction
The CDP Logger is a component for logging values and events from the system. This example demonstrates how to create a simple application for logging a sine signal.
Note: By default, the CDP Logger component also logs all events from the system. This can be disabled by setting Event Logging to false in the CDP Logger component.
Setting up CDP Logger
Setting up the Control System
Follow these steps:
- Create a new CDP Studio system and name it CDPLoggerDemo.
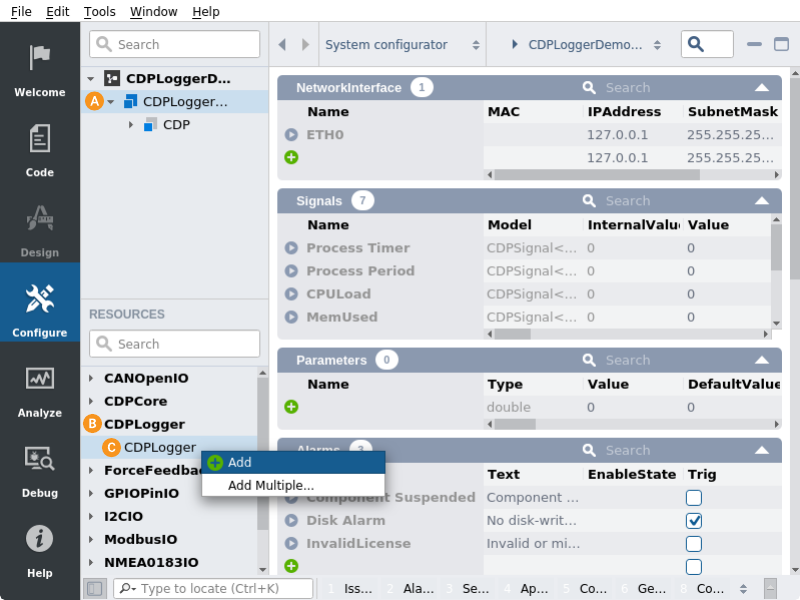
- Click on the default application called CDPLoggerDemoApp and go to the Table Editor tab.
- Expand CDPLogger from Resource tree.
- Add a CDPLogger component.
Configuring CDP Logger
Configure Datastore
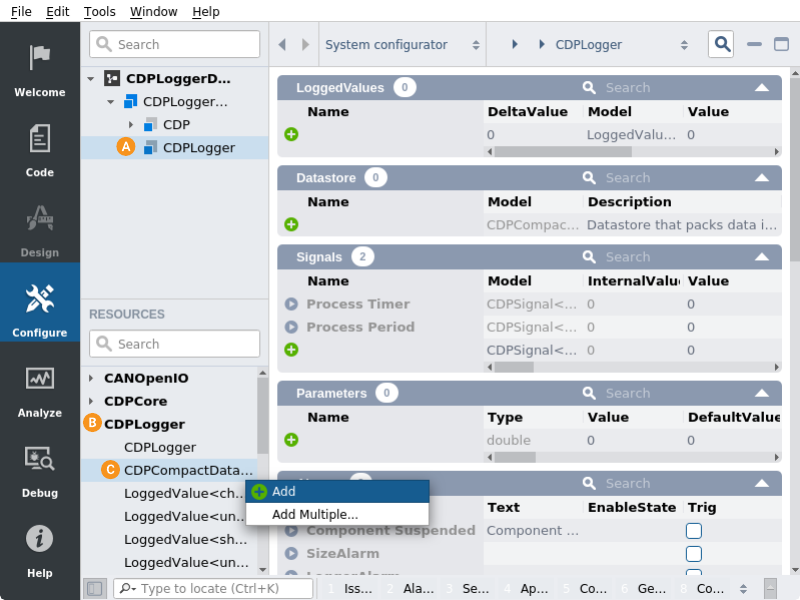
Next, add a CDPCompactDatastore to the CDP Logger component.
- Click on CDPLogger component.
- Expand CDPLogger from Resource tree.
- Add CDPCompactDatastore.
Note: This example uses CDPCompactDatastore which logs data to a high-performance local file-based database but there are other datastores available like InfluxDatastore or TimescaleDatastore. See the Choosing a Datastore page for more information about available datastores and their pros and cons.
Add Sine Component
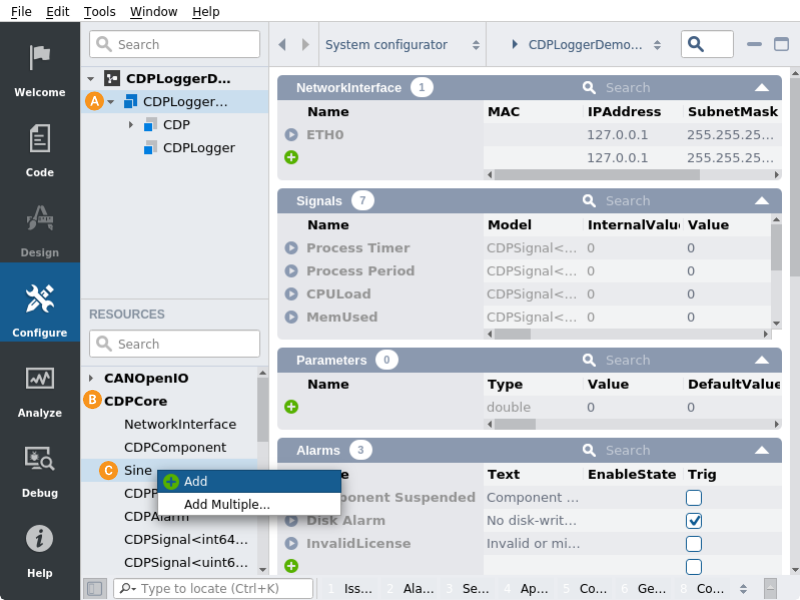
Now we need something to log. A Sine component will generate sine signal.
- Click on CDPLoggerDemoApp.
- Expand CDPCore from Resource tree.
- Add a Sine component.
Add Value to Log
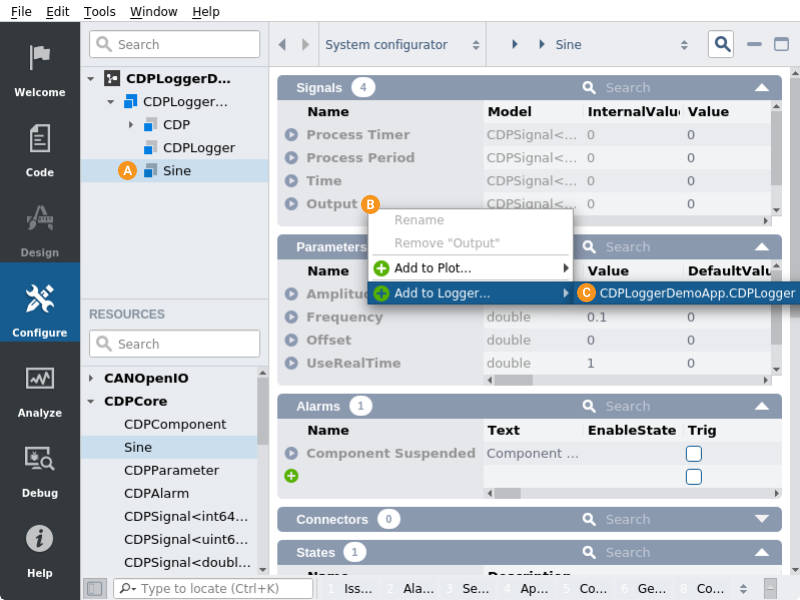
- Click on Sine component in the Project tree
- Find signal called Output.
- Add it to CDP Logger component by right clicking and selecting "Add to Logger...".
Configure the Logged Signal
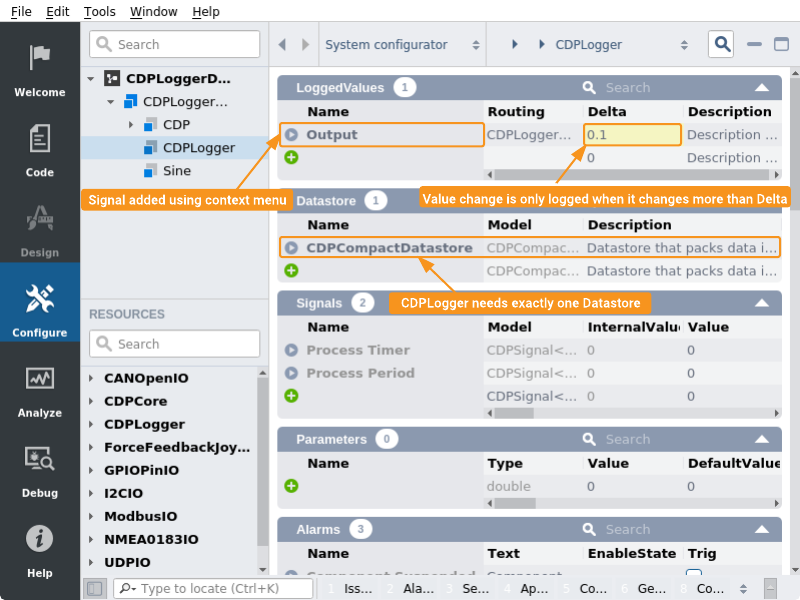
Open again CDP Logger component. Under LoggedValues table you should now see the signal called Output - the name set here will become the friendly name of the logged value and is used by some tools when viewing data.
Add a Delta of 0.1 to it. Value change is only logged if it changes more than Delta. This is used to save disk space.
After completing these steps the system should look like this:
How to Run the Tutorial
To run the tutorial from CDP Studio, select Configure mode, right-click on the system project and select Run & Connect. See the Running and Connecting to the System tutorial for more information.
Testing the System
When connected, view logged data using CDP Studio Analyze mode. Historic Data functionality.
For more options how to view data, see Viewing Data section in CDP Logger manual.
Further Reading
For more information about CDP Logger, see the CDP Logger Configuration Manual which describes how to enable and configure additional features like event logging, stale data detection, size alarm, tagging and more.
For more information about datastores (the backend used by CDP Logger, usually some database), see the Choosing a Datastore page.
Get started with CDP Studio today
Let us help you take your great ideas and turn them into the products your customer will love.