User Defined Structure Example C
Example C
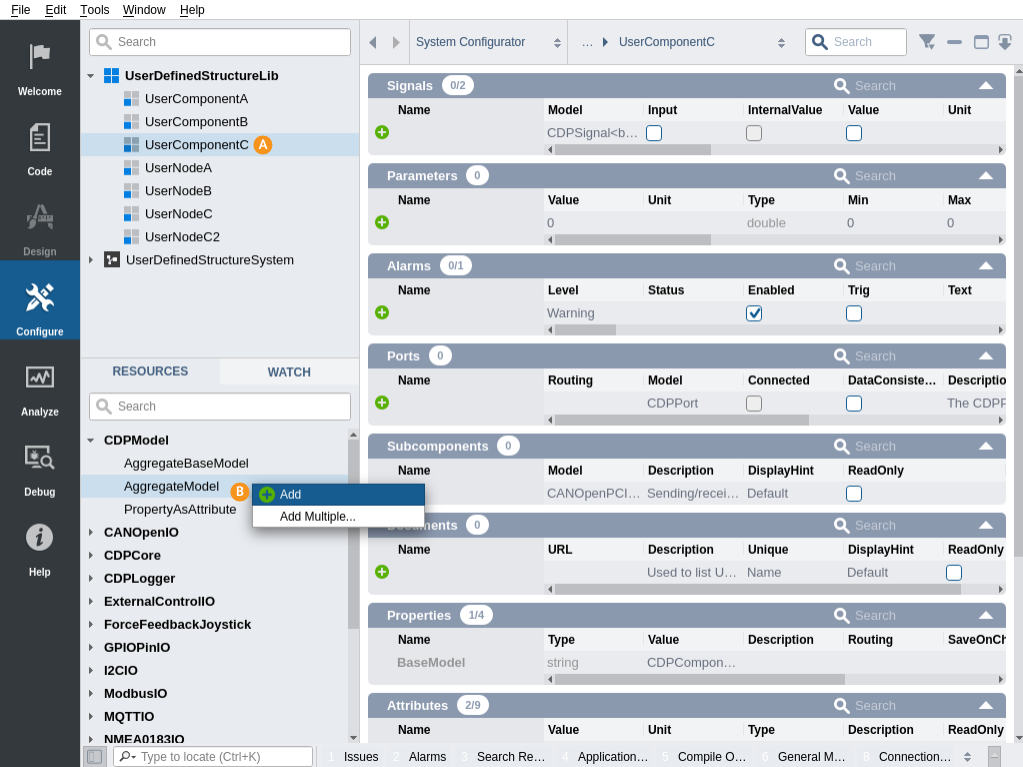
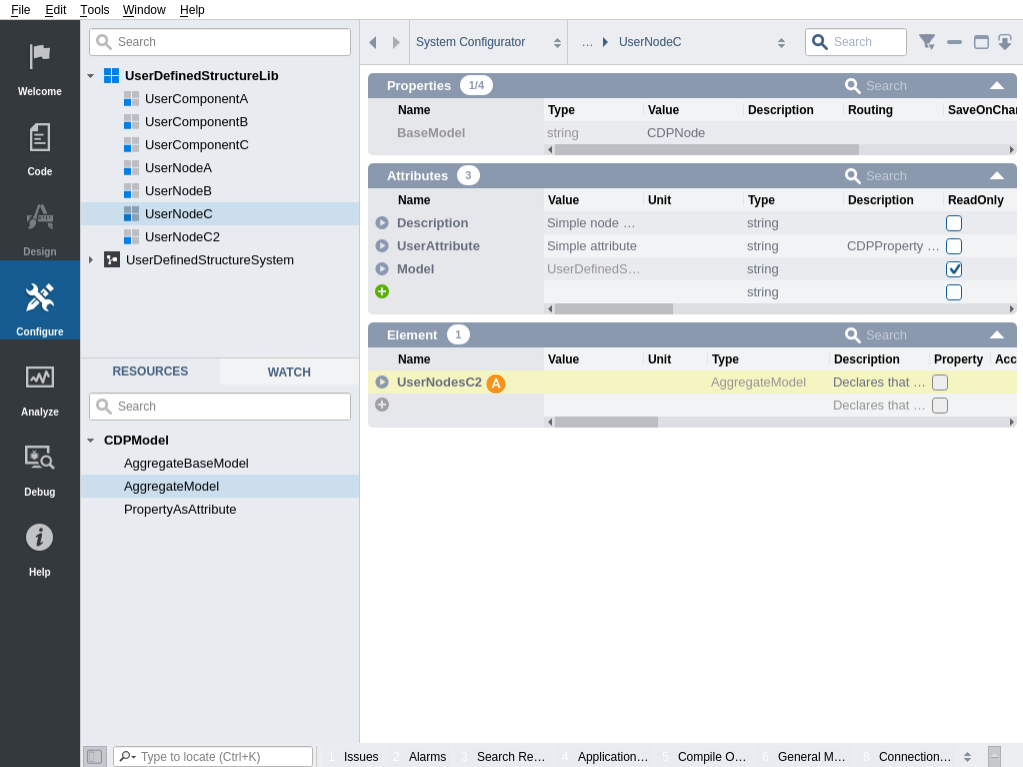
Select UserComponentC under UserDefinedStructureLib
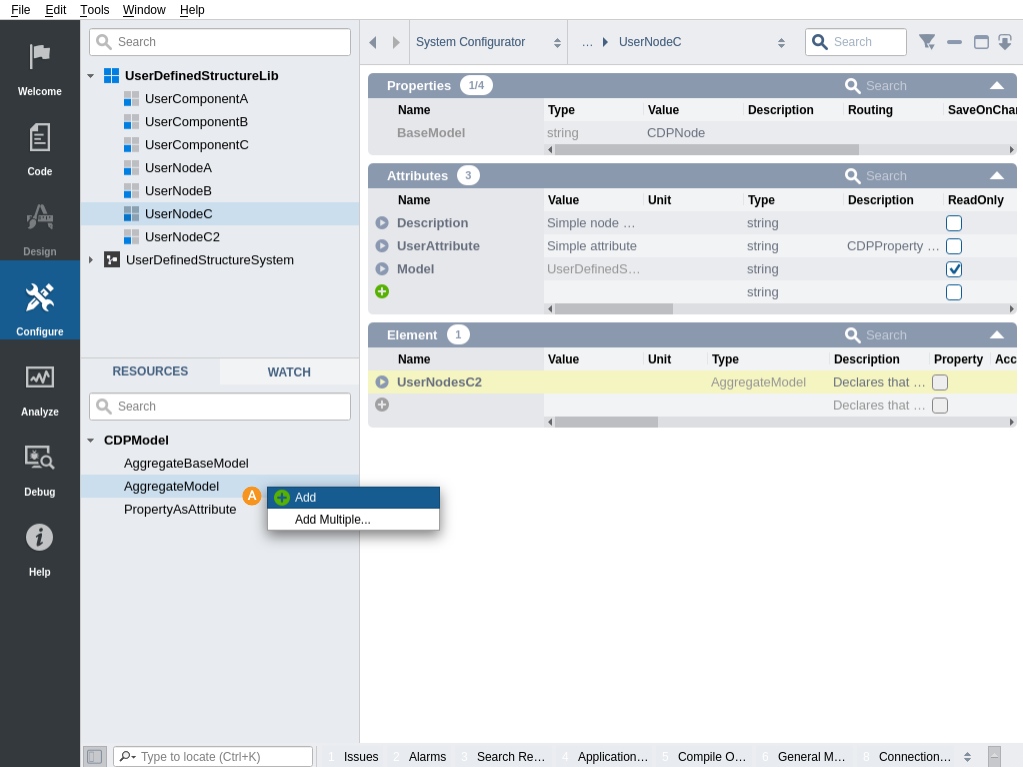
In Resource tree, CDPModel should have appeared. Right-click AggregateModel and select Add option in the context menu
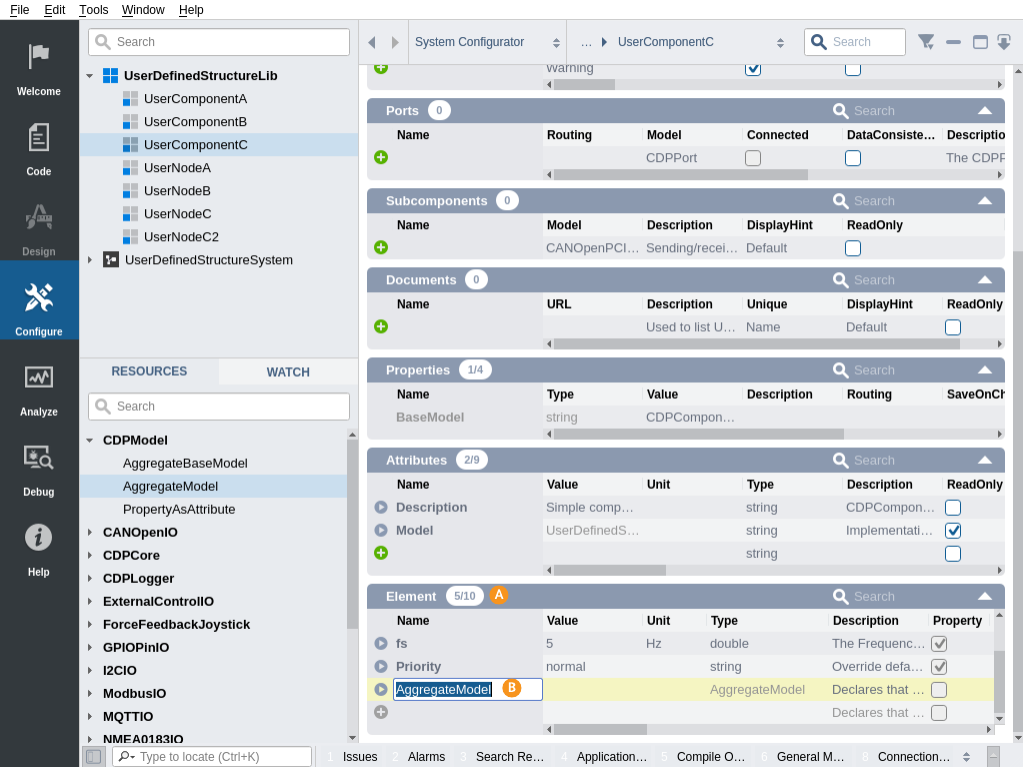
Scroll down to Element-section and find the Element just added (AggregatedModel)
Change the Element name from AggregatedModel to UserNodesC
Once more in Resource tree, under CDPModel right-click AggregateModel and select Add option in the context menu
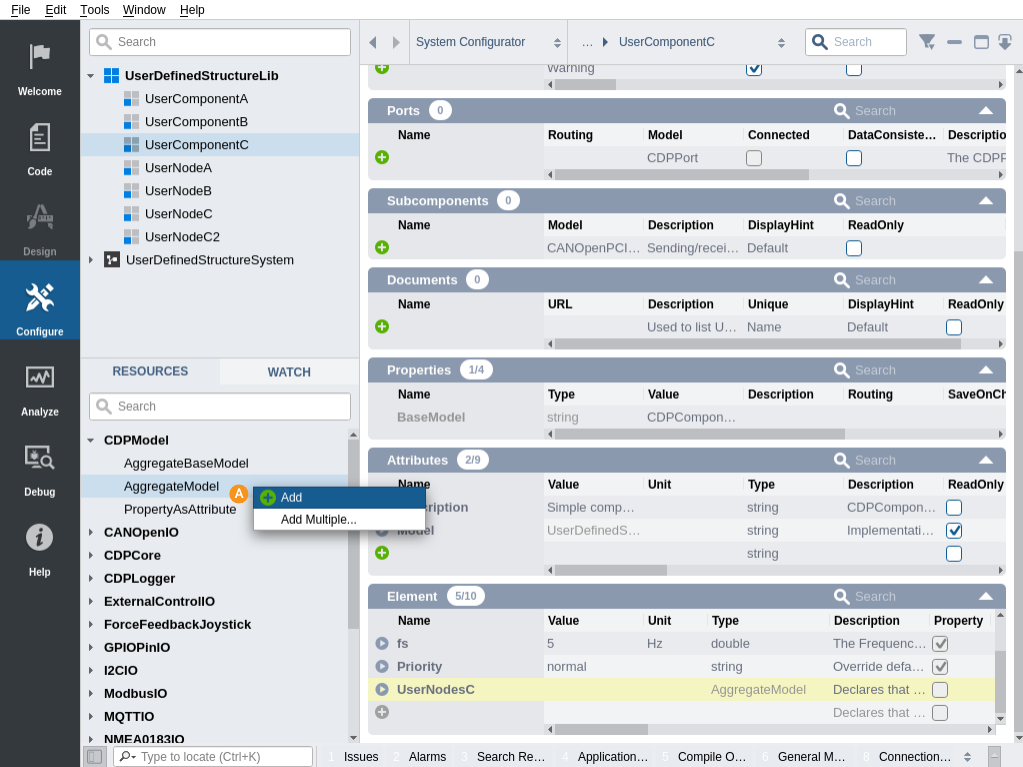
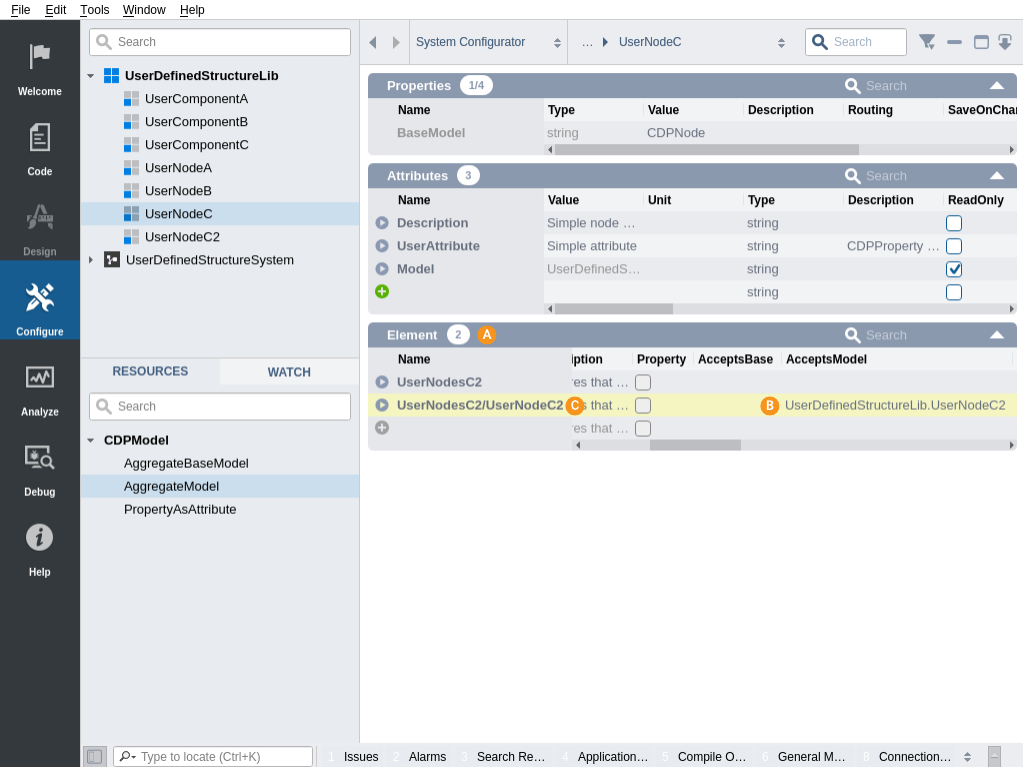
Scroll down to Element-section and find the Element just added (AggregatedModel)
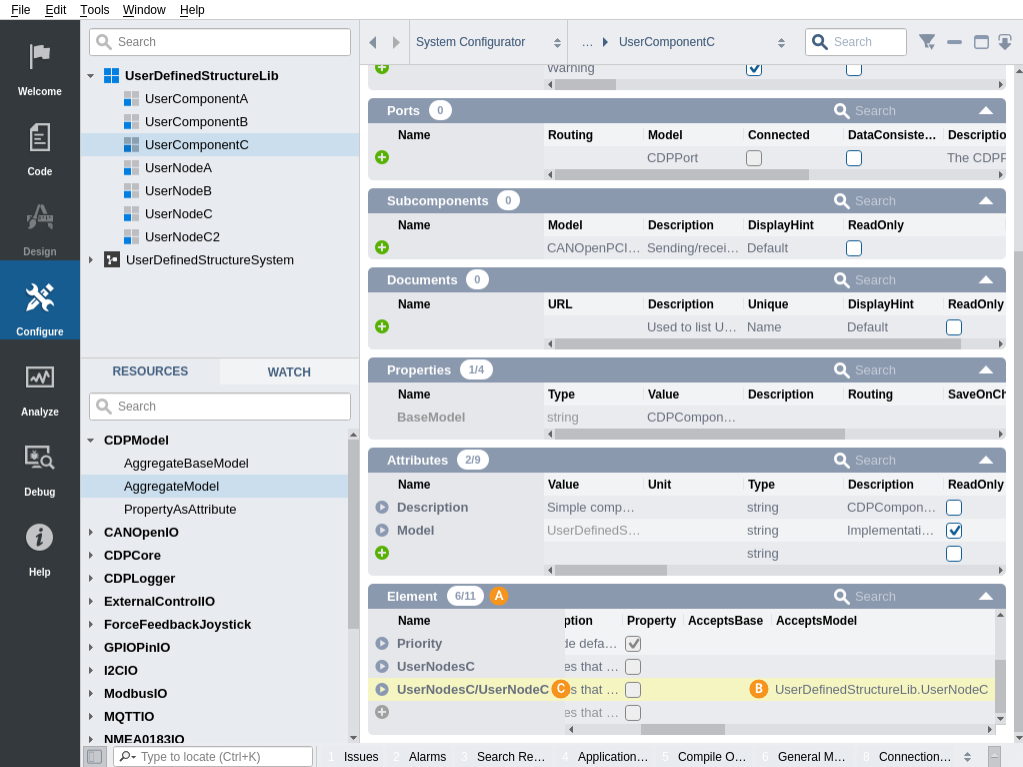
In the AcceptsModel column, enter the model-name which shall be accepted ('UserDefinedStructureLib.UserNodeC')
Change the Element name from AggregatedModel to UserNodesC/UserNodeC
Note: It is important that changing the name is done last, because editing after entering a name containing '/' is not supported.
Select UserNodeC under UserDefinedStructureLib
In Resource tree, right-click AggregateModel under CDPModel and select Add option in the context menu

Change the Element name from AggregatedModel to UserNodesC2
Once more in Resource tree, under CDPModel right-click AggregateModel and select Add option in the context menu
Find the Element just added (AggregatedModel) in the Element-section
In the AcceptsModel column, enter the model-name which shall be accepted ('UserDefinedStructureLib.UserNodeC2')
Change the Element name from AggregatedModel to UserNodesC2/UserNodeC2
Note: It is important that changing the name is done last, because editing after entering a name containing '/' is not supported.
Note: Now you should build your library: Right-click UserDefinedStructureLib and select Build.
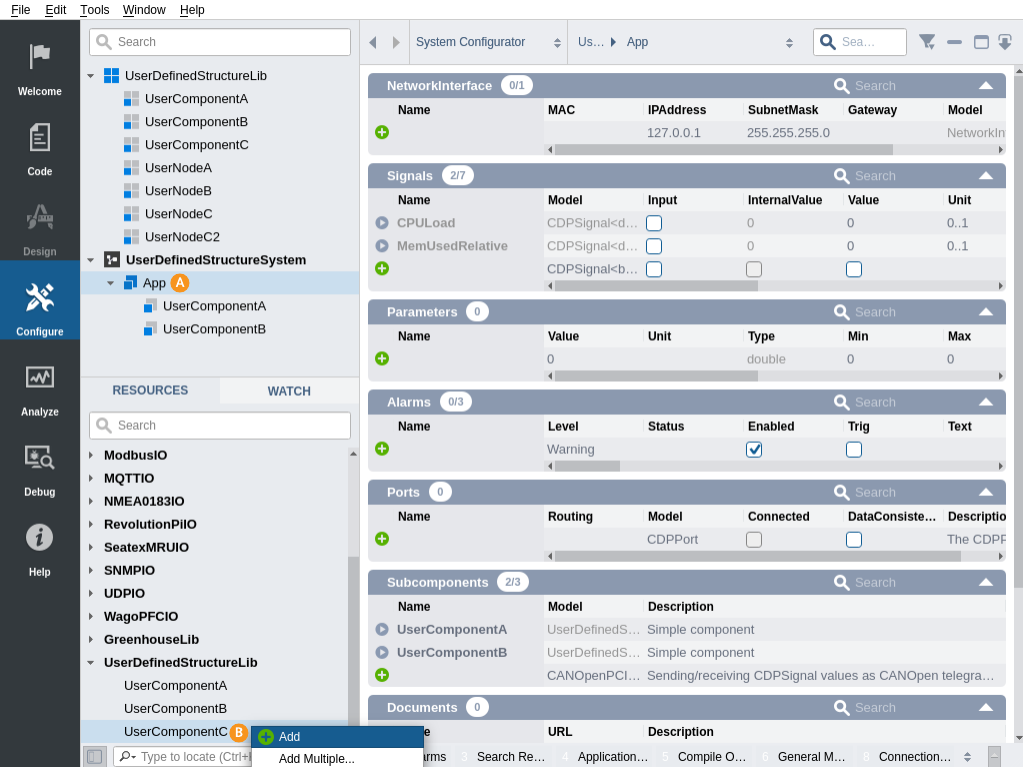
Select App under UserDefinedStructureSystem
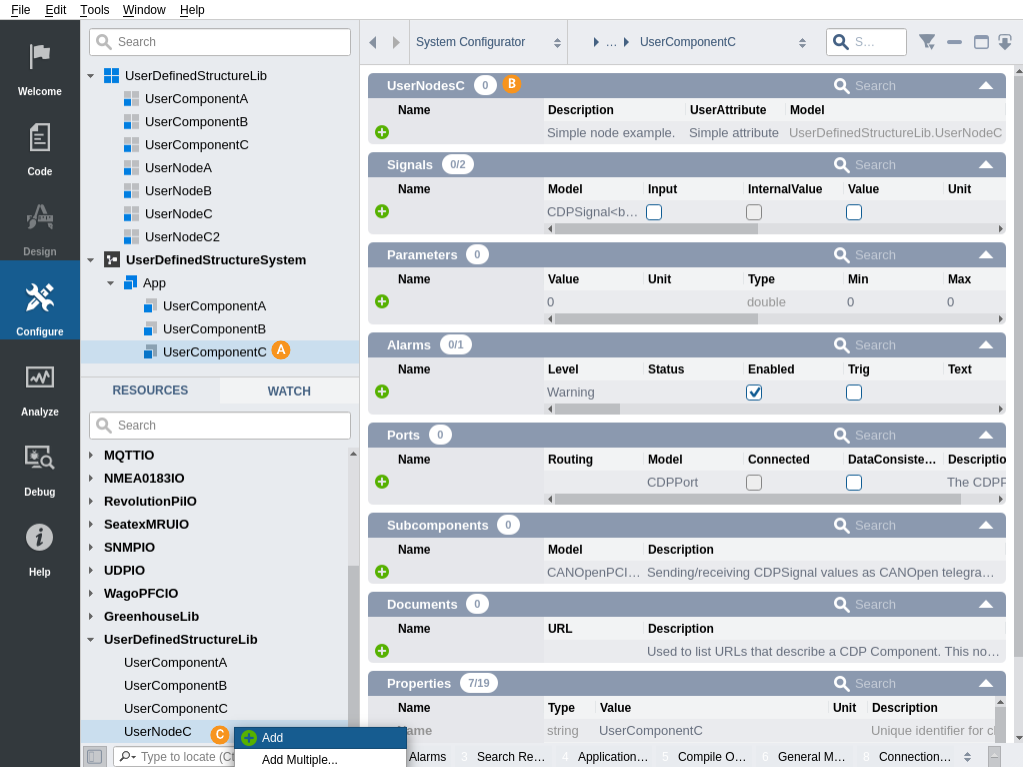
In Resource tree, right-click UserComponentC under UserDefinedStructureLib and select Add
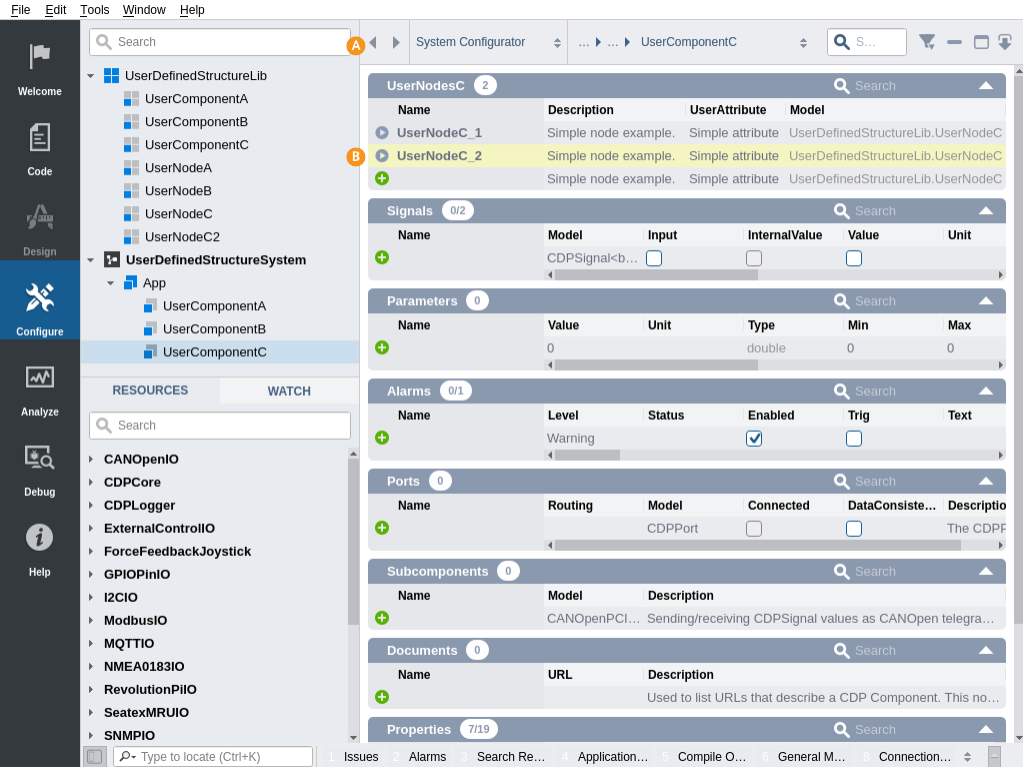
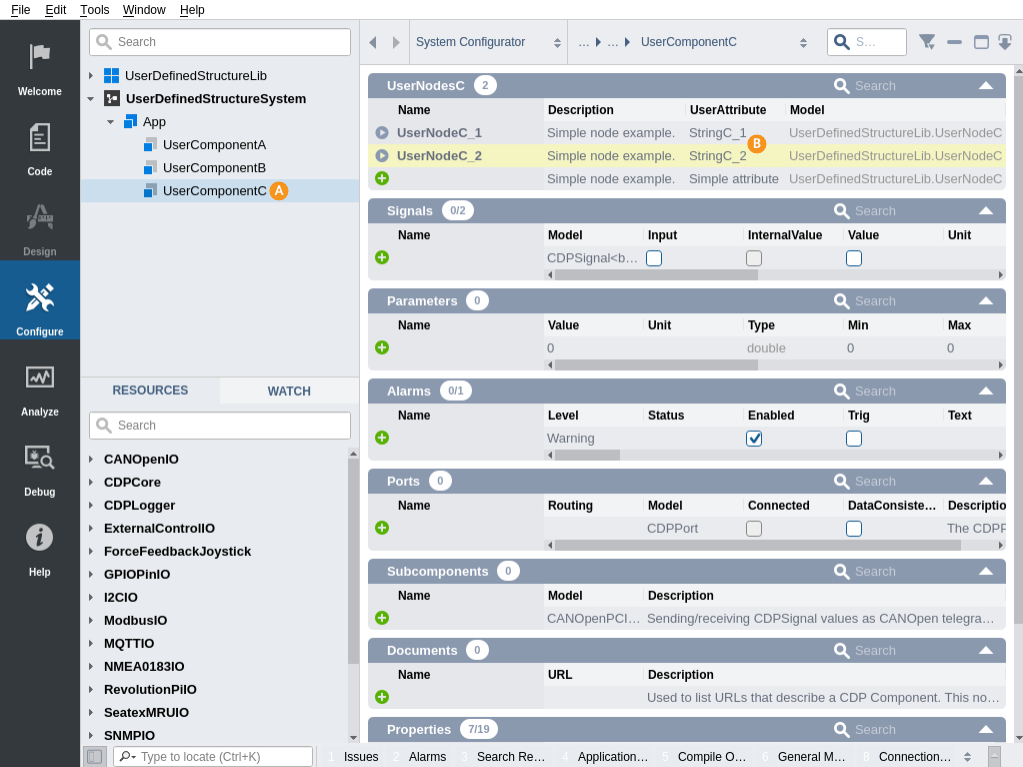
Select UserComponentC under App in UserDefinedStructureSystem
In top of the configuration area for UserComponentC, you can see an empty UserNodesC section.
In Resource tree, right-click UserNodeC under UserDefinedStructureLib and select Add
Add another node of type UserNodeC, and give the names UserNodeC_1 and UserNodeC_2 to the newly added nodes.
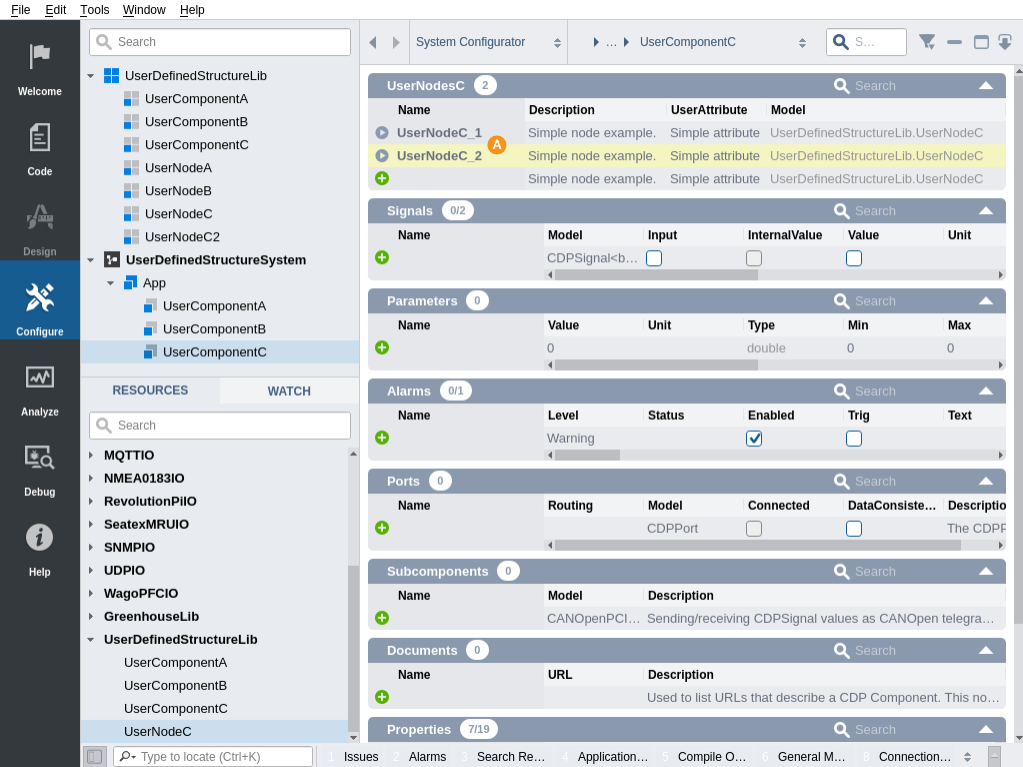
Click button in front of UserNodeC_1

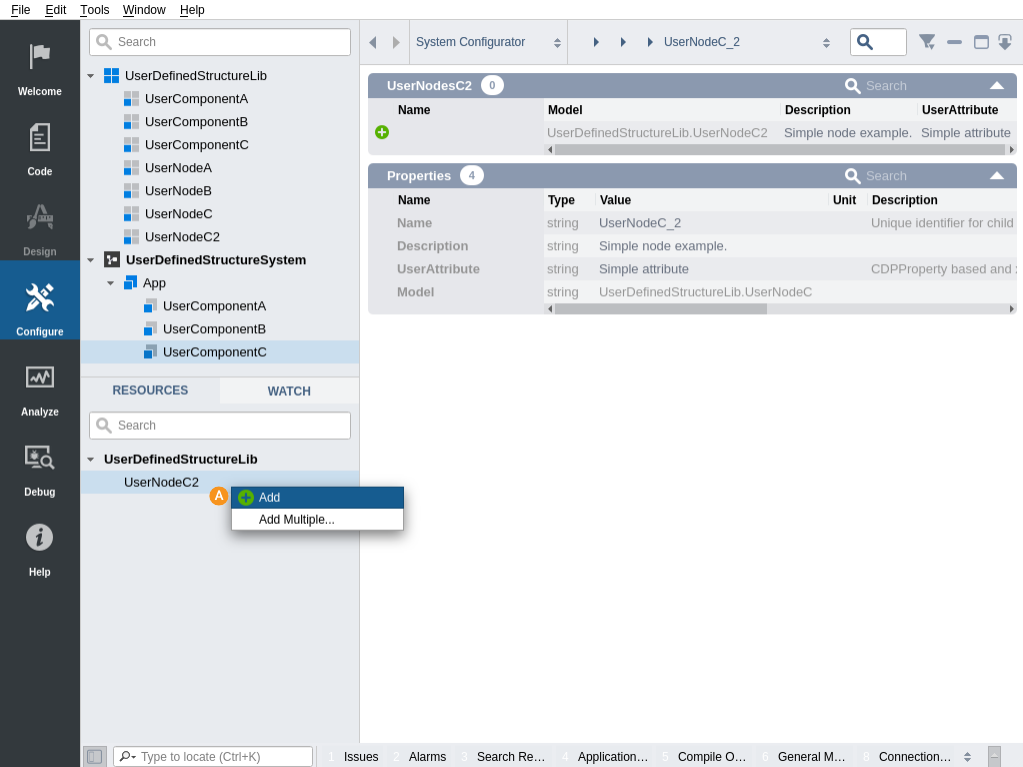
In Resource tree, right-click UserNodeC2 under UserDefinedStructureLib and select Add
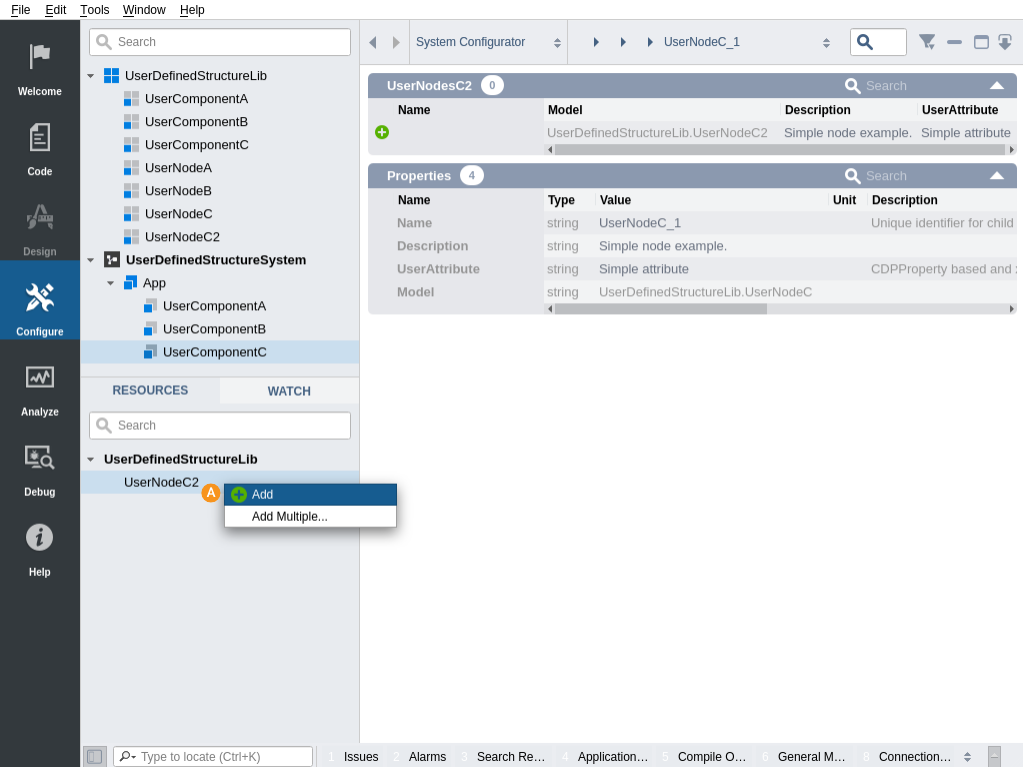
Add 2 more nodes of type UserNodeC2, and give the names UserNodeC2_1, UserNodeC2_2 and UserNodeC2_3 to the newly added nodes.
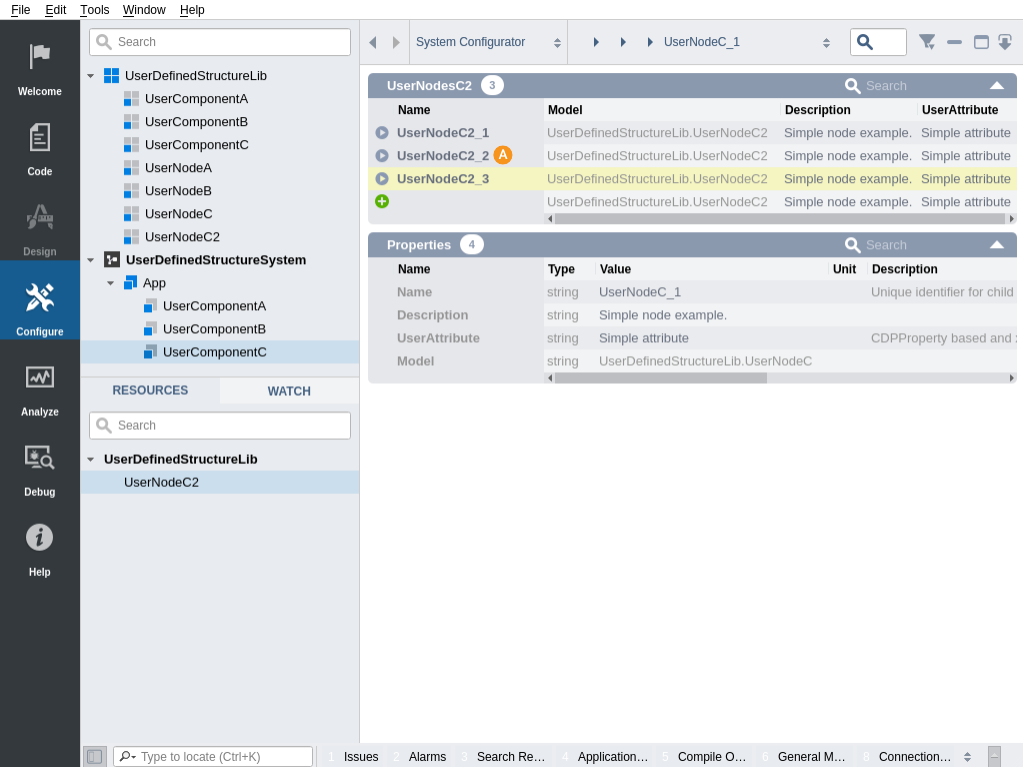
Click on the back-arrow in top of window
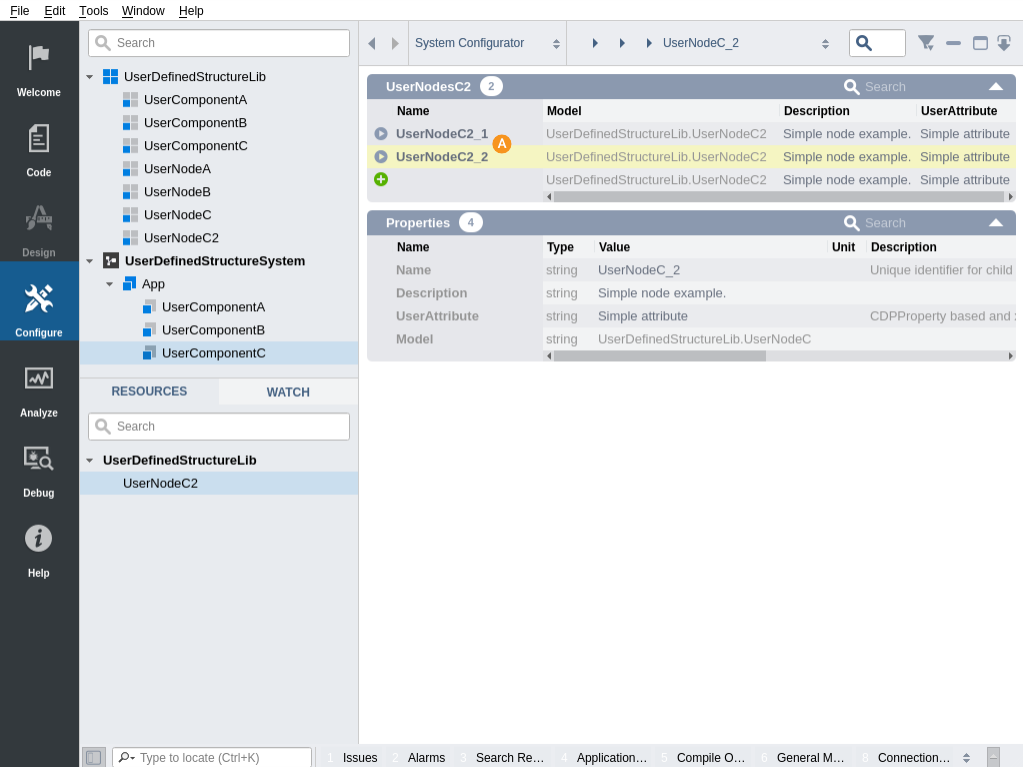
Click button in front of UserNodeC_2
In Resource tree, right-click UserNodeC2 under UserDefinedStructureLib and select Add
Add another node of type UserNodeC2, and give the names UserNodeC2_1 and UserNodeC2_2 to the newly added nodes.
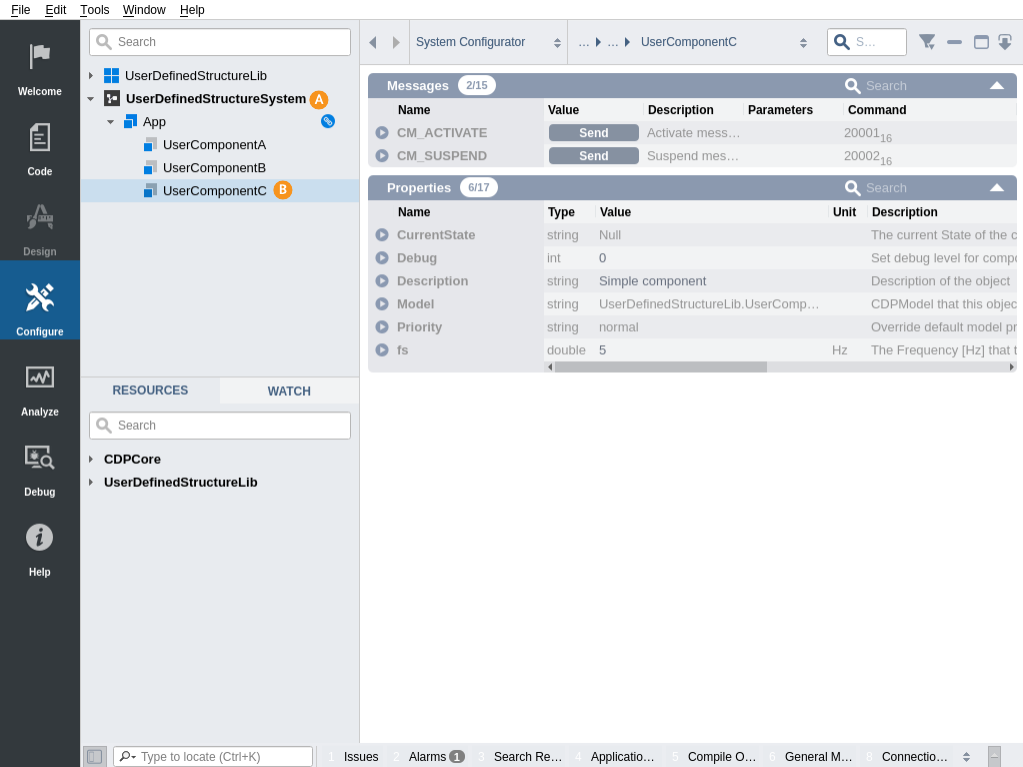
If you now try to run the application without any modifications in the C++-code, no UserNodeC will show up:
Right click on UserDefinedStructureSystem and select Run & Connect
Select UserComponentC under App in UserDefinedStructureSystem
Changes to UserComponentC
The UserComponentC behavior is described by two C++ files UserComponentC.h under Headers, UserComponentC.cpp under Sources in the Code mode Project tree.
The UserComponentC configuration options for CDP Studio are described by the model file UserDefinedStructureLib.UserComponentC.xml under Other files Templates/Models.
The UserComponentC is referred to in the library meta file UserDefinedStructureLib.xml under Other files exposing the file as a user resource that can be added during configuration and in UserDefinedStructureLibBuilder.cpp builder class that is used to create instances during runtime startup.
UserComponentC in the Model File
The syntax of model files is detailed in help page: CDP Model syntax. The configuration done in start of Example C (adding 'AggregateModel' and configuring AcceptsModel), enables UserNodeC to be dragged into UserComponentC under section UserNodesC, during configuration:
<Element Name="UserNodesC" Property="0"></Element>
<Element Name="UserNodesC/UserNodeC" Property="0" AcceptsModel="UserDefinedStructureLib.UserNodeC"></Element>
The "Name" attribute in the Element defines the name used/generated in the configuration files - It can be named anything, except names already used in this model or its base model(s).
The Property="0" attribute makes the element a section definition and not a property element definition.
The AcceptsModel attribute lists one or more ; separated models that are aggregated by the user model. The model syntax provides also an alternative attribute called AcceptsBase that makes the section accept all models that inherit a given base model.
Note: The set of models the section accepts can't intersect with other sections in given model or its base models. This means that the same model can't be used in two different sections in the same view-level.
UserComponentC in C++ Files
To enable UserComponentC to show the nodes of type UserNodeC during Online view (when connected to the running application), we need to add some code. It is has three main items: the container used to keep track of the UserNodeC instances, custom XML configuration handling and exposing the container to serialization in StudioAPI (so they will show up with values in Studio).
Firstly, UserComponentC.h needs a container to hold the pointer to created instances of UserNodeC, but the UserNodeC class should be forward declared before the class definition starts.
Before class declaration:
class UserNodeC;
In class declaration:
protected:
    std::vector<UserNodeC*> m_userNodesC;
Secondly, UserComponentC.h/.cpp needs to override HandleXMLElement() to handle defined UserNodeC tags defined in the XML. The section in component xml-file for UserComponentC which we need to parse, looks like this:
UserComponentC.xml:
<UserNodesC>
  <UserNodeC Description="Simple node example." Model="UserDefinedStructureLib.UserNodeC" Name="UserNodeC_1" UserAttribute="StringC_1">
    <UserNodesC2>
      <UserNodeC2 Description="Simple node example." Model="UserDefinedStructureLib.UserNodeC2" Name="UserNodeC2_1" UserAttribute="StringC2_1"></UserNodeC2>
      <UserNodeC2 Description="Simple node example." Model="UserDefinedStructureLib.UserNodeC2" Name="UserNodeC2_2" UserAttribute="StringC2_2"></UserNodeC2>
      <UserNodeC2 Description="Simple node example." Model="UserDefinedStructureLib.UserNodeC2" Name="UserNodeC2_3" UserAttribute="StringC2_3"></UserNodeC2>
    </UserNodesC2>
  </UserNodeC>
  <UserNodeC Description="Simple node example." Model="UserDefinedStructureLib.UserNodeC" Name="UserNodeC_2" UserAttribute="StringC_2">
    <UserNodesC2>
      <UserNodeC2 Description="Simple node example." Model="UserDefinedStructureLib.UserNodeC2" Name="UserNodeC2_1" UserAttribute="StringC2_1"></UserNodeC2>
      <UserNodeC2 Description="Simple node example." Model="UserDefinedStructureLib.UserNodeC2" Name="UserNodeC2_2" UserAttribute="StringC2_2"></UserNodeC2>
    </UserNodesC2>
  </UserNodeC>
</UserNodesC>
UserComponentC.h:
bool HandleXMLElement(XMLElementEx *pEx) override;
UserComponentC.cpp:
bool UserComponentC::HandleXMLElement(XMLElementEx *pEx)
{
    const XMLString& currentElement = pEx->GetName();

    if (currentElement == "UserNodesC") // this is just wrapper element for UserNode elements
        return false; //not done with handling, handleElement for childern also

    if (currentElement == "UserNodeC")
    {
        m_userNodesC.push_back(new UserNodeC(pEx, this));
        return true; // done with handling the structure
    }

    return CDPComponent::HandleXMLElement(pEx);
}
Thirdly, UserComponentC.h/.cpp needs to override FillNodeChildren() to expose UserNodeC instances as its children in StudioAPI during runtime.
UserComponentC.h:
void FillNodeChildren(CDP::StudioAPI::NodeStream &serializer) const override;
UserComponentC.cpp:
void UserComponentC::FillNodeChildren(CDP::StudioAPI::NodeStream &serializer) const
{
    serializer.StdContainerStreamer(m_userNodesC);
    CDPComponent::FillNodeChildren(serializer);
}
To finish up, the class destructor should delete the nodes instantiated, and the UserNodeC header must be included in the UserComponentC.cpp file.
Changes to UserNodeC
The UserComponentC behavior is described by two C++ files UserComponentC.h under Headers, UserComponentC.cpp under Sources in the Code mode Project tree.
The UserNodeC configuration options for CDP Studio are described by the model file UserDefinedStructureLib.UserNodeC.xml under Other files Templates/Models.
The UserNodeC is referred to in the library meta file UserDefinedStructureLib.xml under Other files exposing the file as a user resource that can be added during configuration.
UserNodeC in the Model File
The syntax of model files is detailed in help page: CDP Model syntax. The configuration done in start of Example C (adding 'AggregateModel' and configuring AcceptsModel) for UserNodeC, enables UserNodeC2 to be dragged into UserNodeC under section UserNodesC2, during configuration:
<Element Name="UserNodesC2" Property="0"></Element>
<Element Name="UserNodesC2/UserNodeC2" Property="0" AcceptsModel="UserDefinedStructureLib.UserNodeC2"></Element>
The "Name" attribute in the Element defines the name used/generated in the configuration files - It can be named anything, except names already used in this model or its base model(s).
The Property="0" attribute makes the element a section definition and not a property element definition.
The AcceptsModel attribute lists one or more ; separated models that are aggregated by the user model. The model syntax provides also an alternative attribute called AcceptsBase that makes the section accept all models that inherit a given base model.
Note: The set of models the section accepts can't intersect with other sections in given model or its base models. This means that the same model can't be used in two different sections in the same view-level.
UserNodeC in C++ Files
To enable UserNodeC to show the nodes of type UserNodeC2 during Online view (when connected to the running application), we need to add some code. It is has three main items: the container used to keep track of the UserNodeC2 instances, custom XML configuration handling and exposing the container to serialization in StudioAPI (so they will show up with values in Studio).
Firstly, UserNodeC.h needs a container to hold the pointer to created instances of UserNodeC2, but the UserNodeC2 class should be forward declared before the class definition starts.
Before class declaration:
class UserNodeC2;
In class declaration:
private:
    std::vector<UserNodeC2*> m_userNodesC2;
Secondly, UserNodeC.h/.cpp needs a function to handle defined UserNodeC2 tags defined in the XML.
UserNodeC.h:
void CreateUserNodesC2(XMLElementEx *pEx);
UserNodeC.cpp:
void UserNodeC::CreateUserNodesC2(XMLElementEx *pEx)
{
    XMLElementEx* xmlUserNodesC2 = nullptr;
    if (pEx->GetChildElement("UserNodesC2", xmlUserNodesC2))
    {
        XMLElementEx* xmlUserNodeC2 = xmlUserNodesC2->GetChild();
        while (xmlUserNodeC2)
        {
            m_userNodesC2.push_back(new UserNodeC2(xmlUserNodeC2, this));
            xmlUserNodeC2 = xmlUserNodeC2->GetNext();
        }
    }
}
This function should be called from end of UserNodeC constructor, which again is called from UserComponentC::HandleXMLElement().
Thirdly, UserNodeC.h/.cpp needs to add a line in FillNodeChildren() to expose UserNodeC2 instances as its children in StudioAPI during runtime.
serializer.StdContainerStreamer(m_userNodesC2);
To finish up, the class destructor should delete the nodes instantiated, and the UserNodeC2 header must be included in the UserNodeC.cpp file.
Changes to UserNodeC2
The UserNodeC2 has similar definition files as UserComponentC: header, source and model. The only difference is that UserNodeC2 is not added to the Builder class. Only one minor change needs to be done in the constructor of UserNodeC2 (in the C++ files): In the node generated by the wizard, the owner-pointer in the constructor is of type 'CDPBaseObject*'. The UserNodeC2 is created and owned by UserNodeC. UserNodeC does not inherit CDPBaseObject, so you must change the second argument in the constructor from 'CDPBaseObject*' to 'ICDPNode*'.
UserNodeC2.h:
UserNodeC2(XMLElementEx *element, ICDPNode *owner);
UserNodeC2.cpp:
UserNodeC2::UserNodeC2(XMLElementEx* element, ICDPNode* owner)
Note: After the changes done in the C++ files (UserComponentC.h/.cpp, UserNodeC.h/.cpp and UserNodeC2.h/.cpp), remember to build the library.
Configuring UserNodeC's and UserNodeC2's Property Values and Show Values in Runtime
By default, a CDPNode created by the wizard has one property to contain a user-value (in addition to the standard attributes/properties called "Model" and "Description"). In the model-file, this property is called "UserAttribute" of type "string" with value "Simple attribute". To modify the value for the 2 UserNodeC in UserComponentC:
Select UserComponentC under App in UserDefinedStructureSystem
Find the "UserAttribute" column in "UserNodesC" section and change the value to "StringC_1" for UserNodeC_1 and to "StringC_2" for UserNodeC_2.
Click button in front of UserNodeC_1
Find the "UserAttribute" column in "UserNodesC2" section and change the values to "StringC2_1", "StringC2_2" and "StringC2_3" for UserNodeC2_1, UserNodeC2_2 and UserNodeC2_3.

Click on the back-arrow in top of window
Click button in front of UserNodeC_2
Find the "UserAttribute" column in "UserNodesC2" section and change the values to "StringC2_1" and "StringC2_2" for UserNodeC2_1 and UserNodeC2_2.

If you now try to run the application, nodes of type UserNodeC will show up in the configured section UserNodesC:
Right click on UserDefinedStructureSystem and select Run & Connect
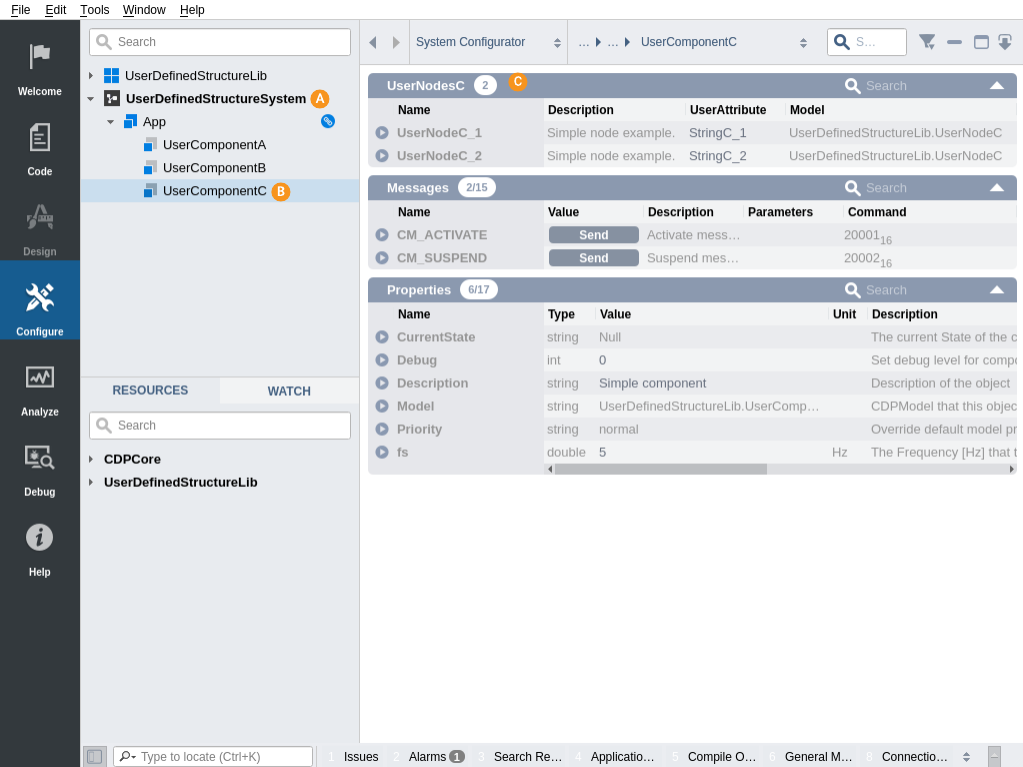
Select UserComponentC under App in UserDefinedStructureSystem
The section UserNodesC shows the 2 nodes with correct values.
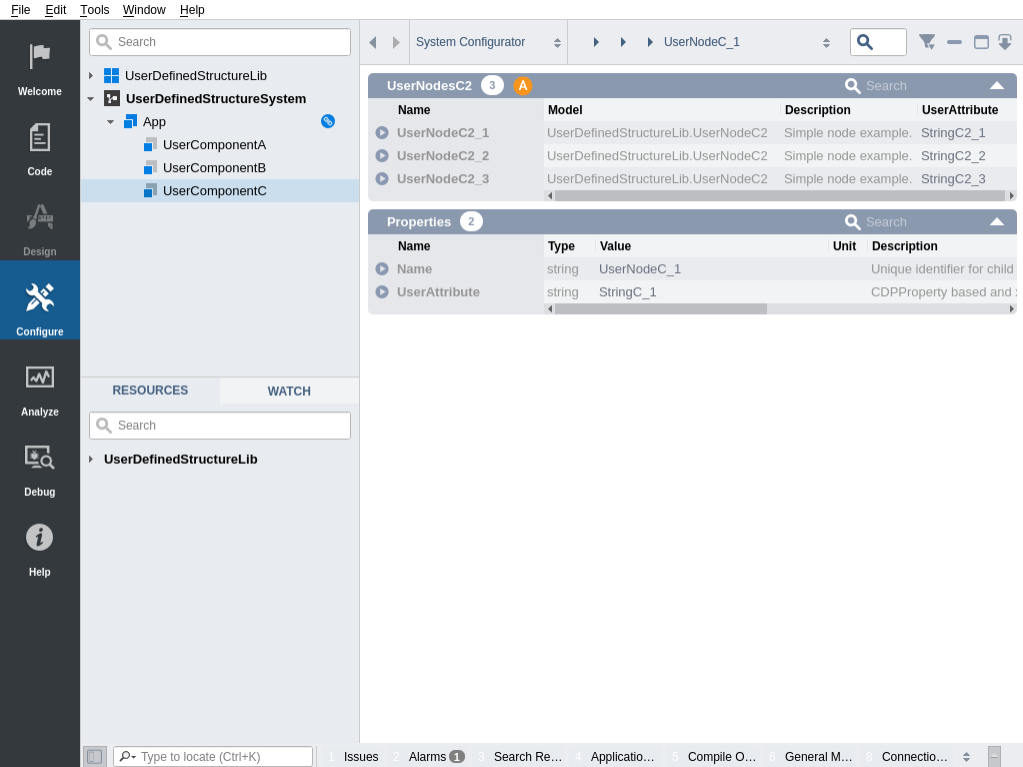
Click button in front of UserNodeC_1
The section UserNodesC2 shows the 3 nodes with correct values.
Click on the back-arrow in top of window
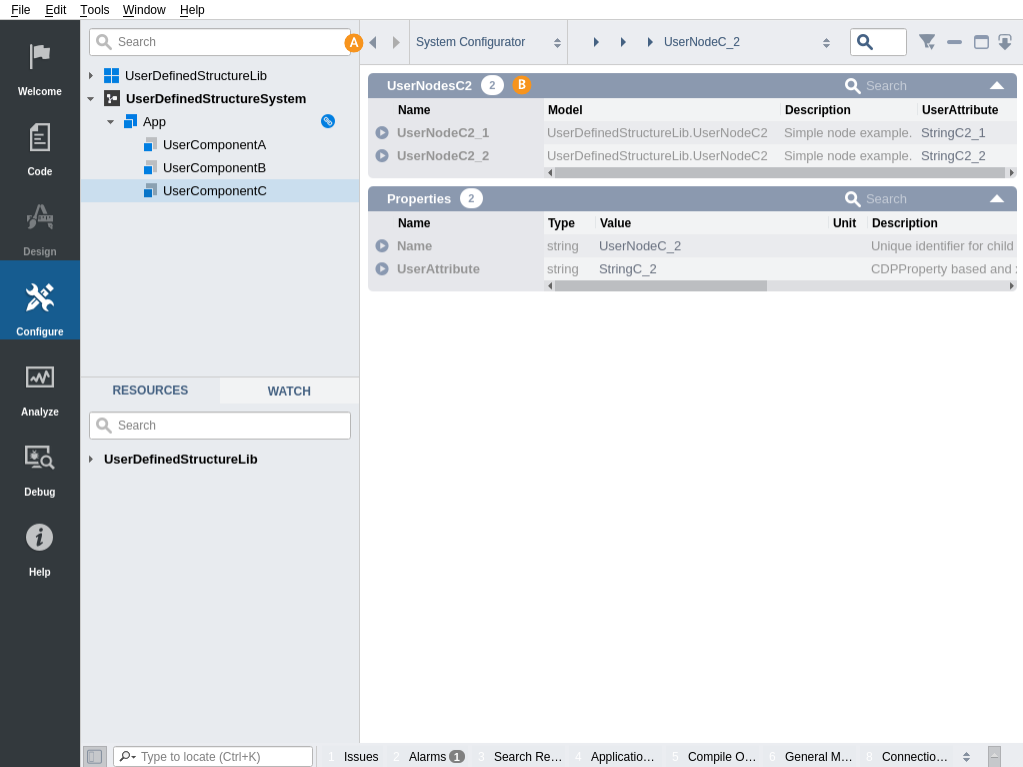
Click button in front of UserNodeC_2
The section UserNodesC2 shows the 2 nodes with correct values.
Files
Get started with CDP Studio today
Let us help you take your great ideas and turn them into the products your customer will love.