Remote Access Over SSH
SSH Tunneling
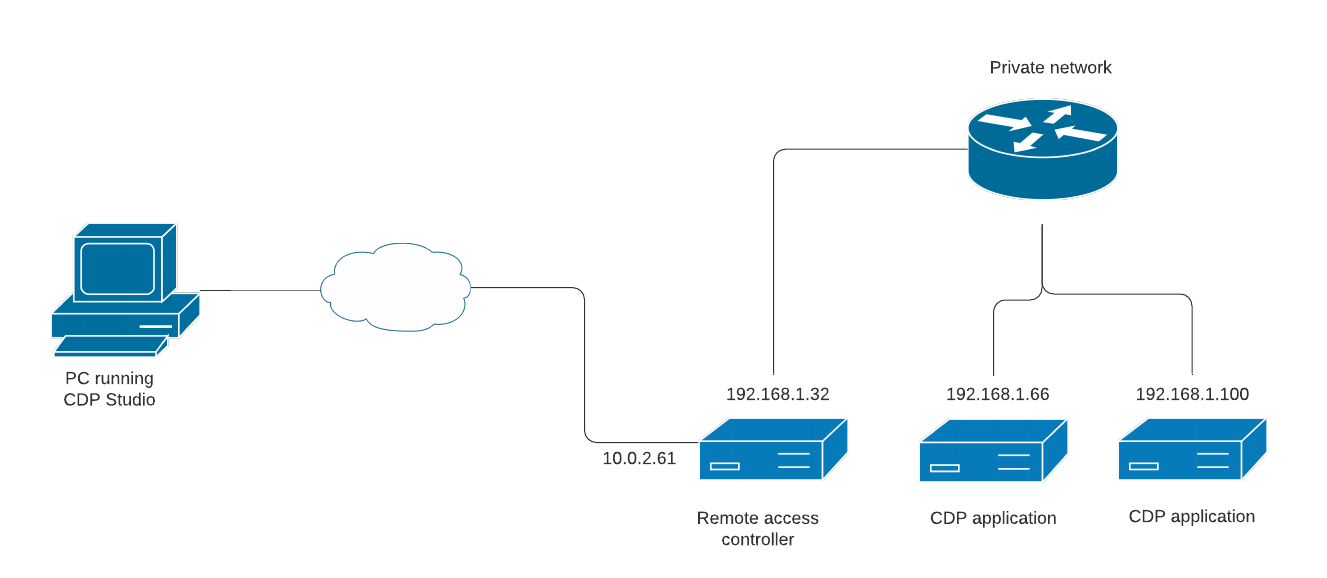
It is possible to deploy CDP Systems to remote networks over an encrypted Secure Shell connection, as well as connect and monitor these systems remotely and securely. Additionally, it can be used to access devices that are not directly accessible over the internet or are behind a firewall. This is an alternative to configuring and setting up a VPN connection. Access to the CDP system will be forwarded through one remote access controller (proxy machine).
For example, in the following diagram the PC running CDP Studio does not have direct access to 192.168.1.66 controller running a CDP application but can connect by tunneling through the 10.0.2.61 remote access controller.
An SSH tunnel must be set up outside CDP Studio on an operating system level.
Note: The following guide requires administrative/root access to the local machine to install and configure the necessary software. If this is not possible, a simplified tunneling method connecting to an already running CDP system is described at the end of this page.
Setting up SSH Tunneling on Windows
In this example, we will set up an SSH tunnel using ProxyCap which has native support for the SSH protocol. Download and install it from https://www.proxycap.com/.
To set up tunneling, open ProxyCap by right-clicking on its icon in the system tray and selecting Configuration from the context menu.
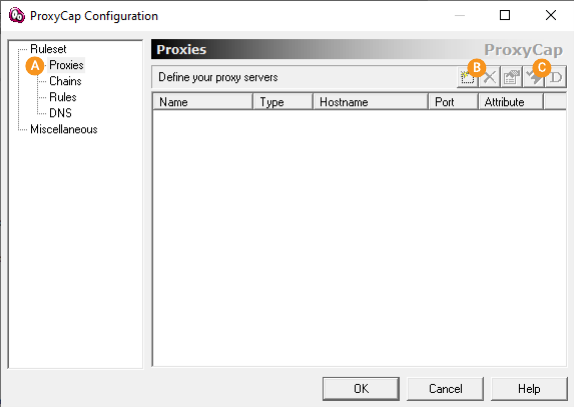
Page for adding a proxy device - in this example the 10.0.2.61 remote access controller.
Button to open the add new proxy device dialog.
Button to test the connection to the proxy device.
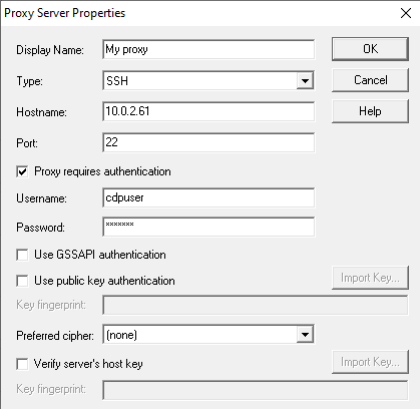
First we will add a proxy device. On page click button . A dialog will open where we will set the Type to SSH and fill the required fields to connect to the proxy machine.
Once a proxy has been added, go to the Rules page () and click on the Quick Add Rule () button.
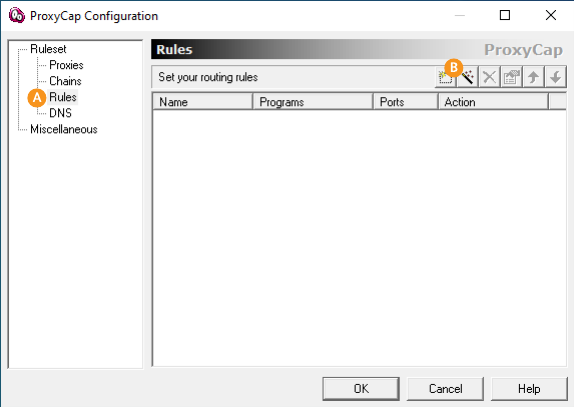
In the following dialog select the correct proxy device () and set the IP range that will be forwarded through the proxy (). In this example, we want to connect to the 192.168.1.x subnet.

The SSH tunneling should now be active. If not, right click on the ProxyCap icon in the system tray and select Enable ProxyCap.
After a tunnel has been set up, add a new remote network to CDP Studio as described at the end of this page.
Setting up SSH Tunneling on Linux
In this example, we will set up an SSH tunnel using sshuttle. On a Debian-based system it can be installed by running the following as root user:
sudo apt-get install sshuttle
Next for example to set up a connection to 192.168.1.x subnet tunneled through 10.0.2.61 remote access machine execute the following command as root user:
sshuttle -r cdpuser@10.0.2.61 192.168.1.0/24
Note: sshuttle requires the proxy machine (in this example 10.0.2.61) to have python installed. Most Linux distributions have it by default. Other tools like ProxyCap in the Windows example do not have this limitation but this also means they can't take advantage of the performance benefits of multiplexing packets with python.
Adding a Tunneled Remote Network to CDP Studio
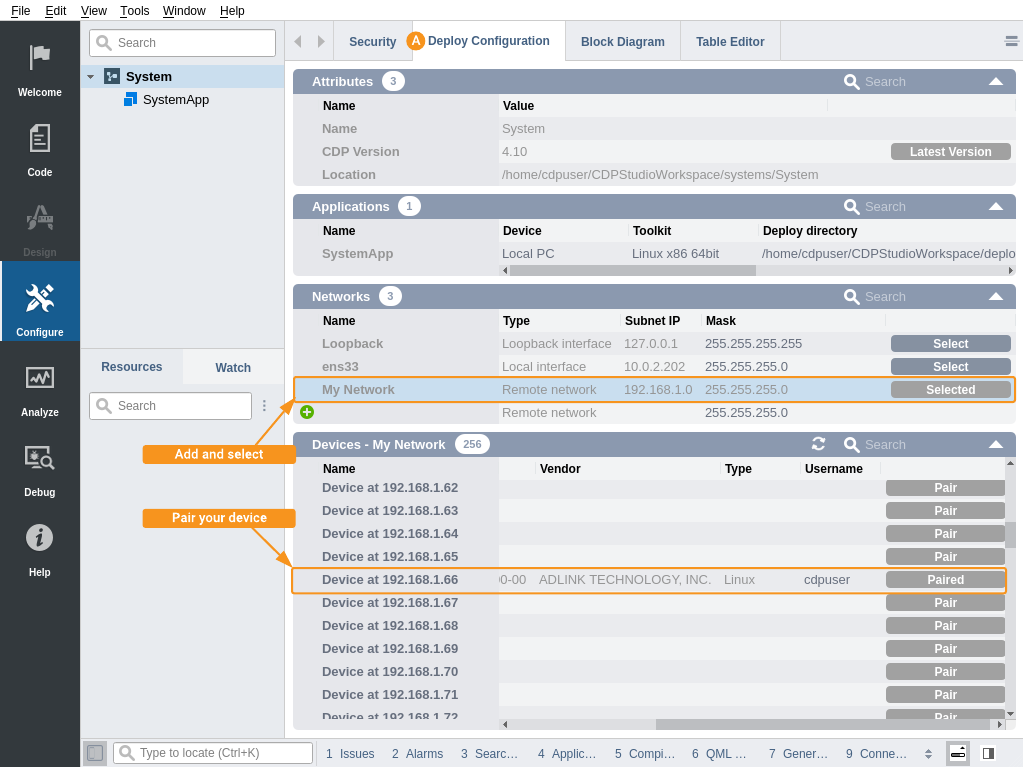
After a tunnel has been set up in the operating system level, open a system in CDP Studio and add a new remote network in the Deploy Configuration tab () as described in the Deploy Configuration manual. Set Subnet IP to 192.168.1.0 and Mask to 255.255.255.0. You should now be able to scan the remote network.
The same method can be used to scan and connect to a running system using the Welcome mode connect functionality described in the How to Connect to Already Running System manual.
Note: A limitation in SSH tunneling prevents scanning for open ports, so the devices list in CDP Studio will list all possible IP addresses in the subnet as potential devices. The scan range can be limited by modifying the subnet IP and mask. For example, to only find one specific device we could have set subnet IP to 192.168.1.66 and mask to 255.255.255.255.
Simplified Tunneling for Connecting to a Running System
Note: The method described in this section requires CDP version 5.1 or newer, which supports the CDP's built-in StudioAPI proxy service.
While setting up an SSH tunnel using ProxyCap or sshuttle as described above is recommended, it requires having administrative/root access to the local machine and installing additional software. If this is not possible, for just connecting to an already running CDP system, a simplified SSH tunnel can be set up that only forwards a single port from a single device. This is because any CDP application can forward data from any other CDP application in the same system, even if they run on different devices using the CDP's built-in StudioAPI proxy service.
For example, given the same network diagram as above, we can set up a tunnel to the 192.168.1.66 device for a CDP application listening on port 7689 through the 10.0.2.61 machine. On either Windows or Linux, run the following command in the terminal:
ssh -L 7689:192.168.1.66:7689 cdpuser@10.0.2.61
This command will open a remote shell and forward all traffic from 192.168.1.66:7689 to 127.0.0.1:7689 on the local machine while the remote shell is open. After that, use CDP Studio Welcome mode Connect to scan for systems on the Loopback network as described in the How to Connect to Already Running System manual. The tunneled system should show up in the list.
Finding the Correct Port for SSH Tunneling
The default port for accessing a CDP application is 7689 and if there are multiple applications in the system, each application will use the next available port (7690, 7691, ...). To find the correct port for the device you want to connect to, check the stdout log printed to Application Output pane when the application starts. Look for a line similar to the following "StudioAPIServer: listening on 192.168.1.66:7689".
Limitations of Simplified Tunneling
Compared to ProxyCap or sshuttle, which forward all traffic to the remote subnet on all ports (meaning that all CDP Studio functionality will work without any additional configuration), the simplified tunneling method only allows making a StudioAPI connection to an already running CDP application. The following CDP Studio functionalities will not be available:
- Deploying/Fetching/Downloading a system to/from a remote network.
- The Block Diagram will not list GUI routings from other applications.
- For older CDP versions, CDP Studio will only connect to a single CDP application and in Analyze mode, historic data from CDPLogger will not be available.
Get started with CDP Studio today
Let us help you take your great ideas and turn them into the products your customer will love.