Force Feedback Joystick Setup Guide
Introduction
This guide demonstrates a system that uses a ForceFeedbackJoystick component to get joystick-movement information into an application in CDP Studio, the independent automation software for open PC-based real-time distributed control systems. This is implemented by setting up an Application with a ForceFeedbackJoystick component. When running the component, values are continously transfered from the physical joystick into the ForceFeedbackJoystick component.
Set up a Test-system
First we set up a System that the joystick component can be tested in:
Create a system named JoystickDemo with a Console application named JoystickDemoApp, then select Configure mode. See How to Create a system for more information.
Set Up ForceFeedbackJoystick in Application
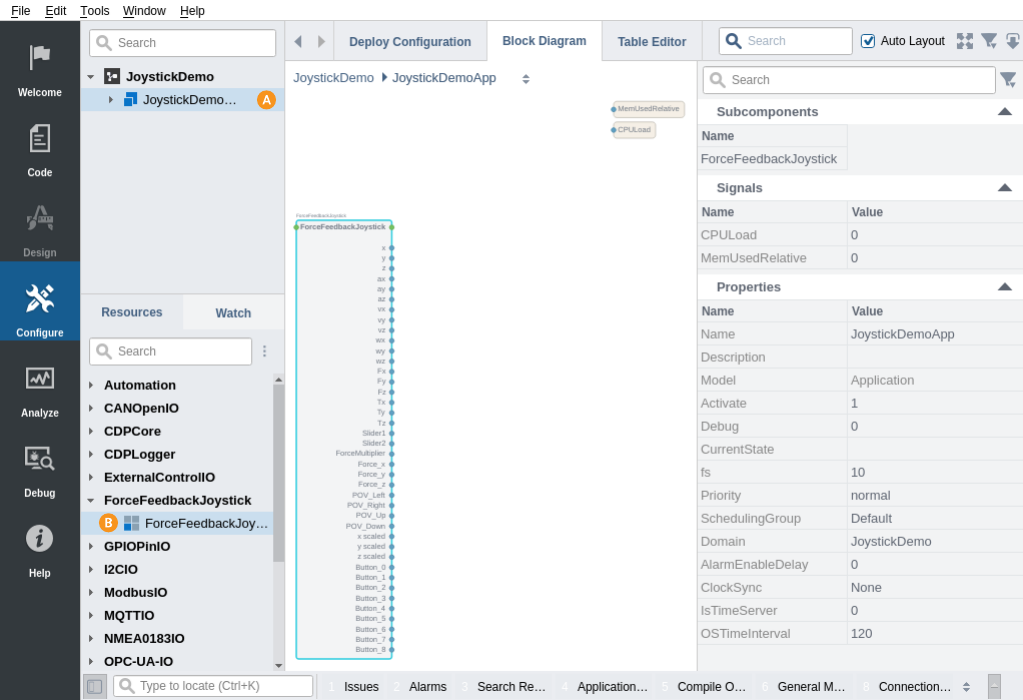
- Select the JoystickDemoApp that resides under JoystickDemo in the Project tree
- In the Resource tree, expand the ForceFeedbackJoystick resource.
- Double-click to add a ForceFeedbackJoystick to JoystickDemoApp
Note: Resources are always added as children to the currently selected item in the Project tree.
- Select the ForceFeedbackJoystick in the subcomponents table.
- Rename the ForceFeedbackJoystick to Joystick.
- Select the Joystick component, and in the Properties table, set Device to '0' to select the first available device. See the Introduction for more information about how to configure the device
How to Run the Tutorial
To run the tutorial from CDP Studio, select Configure mode, right-click on the system project and select Run & Connect. See the Running and Connecting to the System tutorial for more information.
Verify That It Works
- Navigate into JoystickDemoApp Joystick.
- Double-click the Signals header to expand the Signals table.
- Move the physical joystick and take note of which signals that change, and which minimum and maximum values they have.
- If nothing happens when the physical joystick is moved, see Troubleshooting below.
Scale Signals
To make it simpler to treat the signals in generic code in other components, it might be helpful to scale the signals between -1 and 1, where -1 is defined as left/back, and 1 is defined as right/front. To add scaling points, go into each channel you noted above, and for each channel:
- In the Resource tree search-box, enter 'sca' without the apostrophes.
- From the operators that come up, double-click 'Scale<double>'.
- In the Operator table, click on in front of Scale.
- In the Resource tree, double-click to add a ScalingPoint<double>
- In ScalingPoint, set InValue to the value you got when you moved the joystick all the way back or left, and set OutValue to '-1'.
- Add another ScalingPoint<double> from the Resource tree by double-clicking ScalingPoint<double> in the Resource tree
- In ScalingPoint1 that was added, set InValue to the value you got when you moved the joystick all the way front or right, and set OutValue to '1'.
- Repeat these steps for other channels that need scaling.
Troubleshooting
The Application Output window contains messages from the application. Any 'Error' or 'Warning' messages found there indicate problems.
If the joystick is not working, this can typically be caused by:
- No connection with joystick? Check connection with joystick, or batteries, if any.
- No driver installed for the joystick on the target device? Install correct driver.
- Wrong Device is specified. To list available devices, set 'QuietEnumeration' to 0, and watch the application output pane during startup.
- If the Joystick component is not activated, the component will not run. Make sure the property Activate is set to '1'.
Get started with CDP Studio today
Let us help you take your great ideas and turn them into the products your customer will love.