NMEAOnSerial example
Introduction
In this tutorial, you will learn how to send a text message through a virtual serial connection using a terminal (command prompt) to simulate an external NMEA device. The message will be received and decoded by an NMEA component, making the data available to other objects in the system.
This exercise demonstrates how serial NMEA data can be captured by CDP and further processed within a CDP Studio application.
Creating the Connections
The Windows Setup and Linux Setup sections below show how to set up the virtual serial adapters for the corresponding operating system.
Windows Setup
Note: If your test-environment is Linux, skip to Linux Setup below.
- Install the com0com nullmodem emulator. It can be retrieved from https://sourceforge.net/projects/com0com/files/com0com/3.0.0.0/. You should typically download and install the x64 signed version.
- Open a command-prompt (CMD) and type
cd %programfiles(x86)%\com0com
setupc.exe
- A new command window might appear, or the prompt will change to command>. Type the following there:
install PortName=CDPCOM0 PortName=CDPCOM1
quit
You can now skip to Setting up a Test-System below.
Linux Setup
First, two virtual connections have to be created – one for sending data from a terminal and another one for NMEAOnSerial component to receive the data.
- Install the socat utility program; in Debian-derived Linux distributions you can type:
sudo apt install socat
More information about socat can be found here
- Open the terminal and type
socat pty,link=/tmp/CDPCOM0,raw,echo=0 pty,link=/tmp/CDPCOM1,raw,echo=0
- Leave the terminal open for the testing period
- A similar view should be seen in the terminal

Setting up a Test-system
First, we set up a System that the component can be tested in:
Create a system named NMEATest with a Console application named NMEATestApp, then select Configure mode. See How to Create a system for more information.
Adding an NMEAOnSerial Component
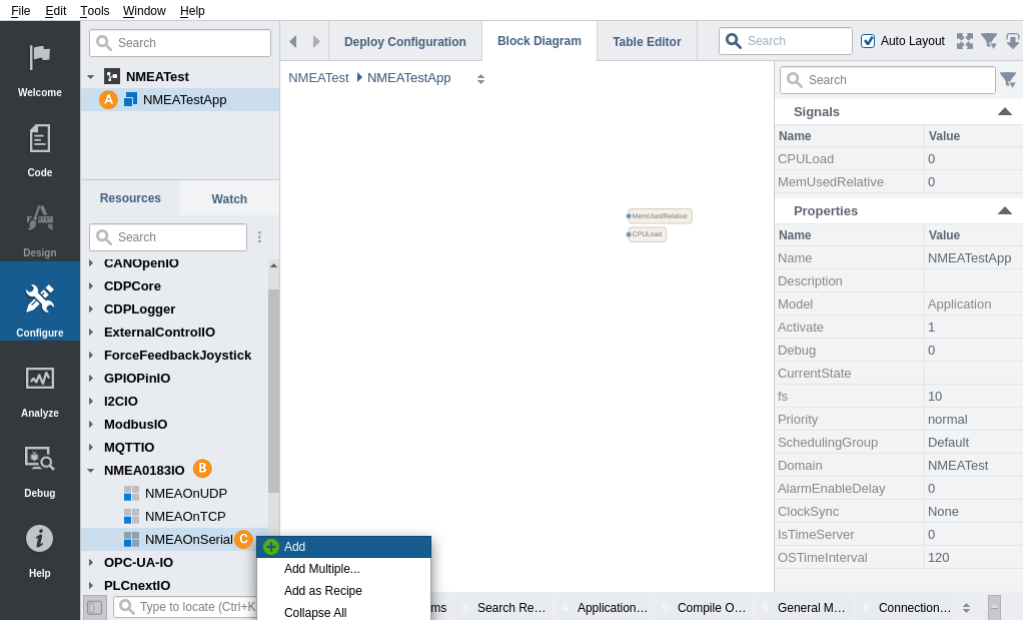
- Click on the default application called NMEATestApp
- Click on NMEA0183IO to expand its contents in the Resource tree
- Choose NMEAOnSerial component and add it to the default application
Adding ReceiveData To NMEAOnSerial and Configuring It
- Double-click on the NMEAOnSerial that was added
- Double-click the SerialTransport to navigate into it
- If you are using Windows: Set the ComPort Value to \\.\CDPCOM0
- If you are using Linux: Set the ComPort Value to /tmp/CDPCOM0
- Select the NMEAOnSerial component in the Project tree
- From the Resource tree, double-click ReceiveData inside the NMEA0183IO resource to add it to NMEAOnSerial
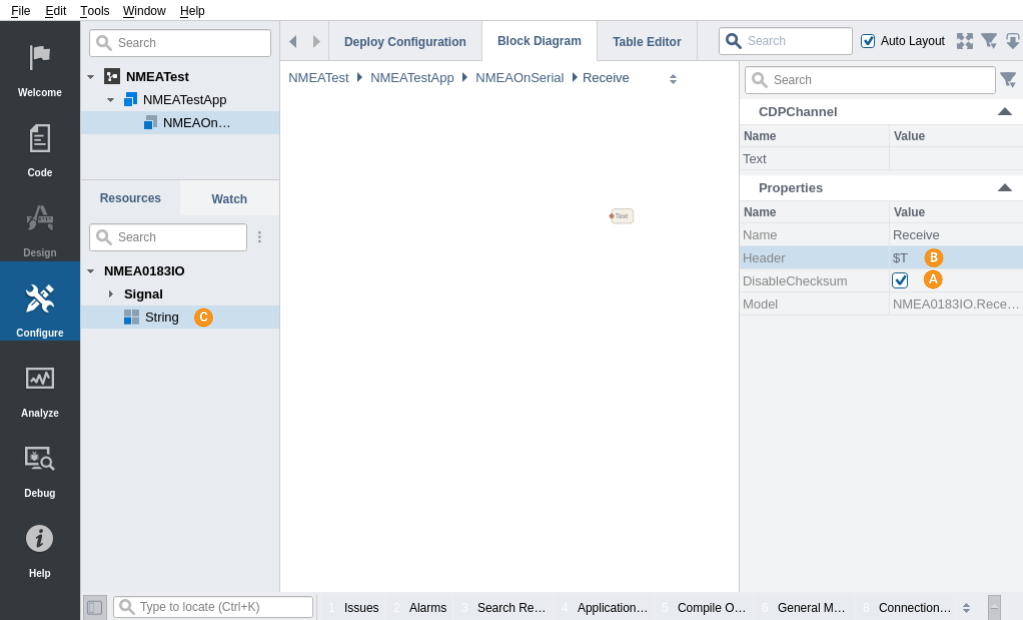
- Double-click Receive to navigate into it
- Tick DisableChecksum. We want this disabled to simplify testing with random data
- Set Header to $T. Anything starting with $T, will now be accepted
- From the NMEA0183IO resource in the Resource tree, double-click a String resource to add it
Note: To learn about other configurable values in SerialTransport, click here.
How to Run the Tutorial
To run the tutorial from CDP Studio, select Configure mode, right-click on the system project and select Run & Connect. See the Running and Connecting to the System tutorial for more information.
Testing the System
- Navigate into NMEATestApp NMEAOnSerial Receive
- If you are using Windows, open a CMD window as Administrator:
- Press the Windows-key to open search
- Type 'CMD'
- Right-click on CMD / Select 'Run as administrator'
- In the CMD window, type the following:
echo $T,My first message > \\.\CDPCOM1
- If you are using Linux, open a Terminal and type:
echo '$T,My first message' > /tmp/CDPCOM1
- Inspect the Receive object's String Value column in CDP Studio; it should change to the text that you typed:

Now that the data has been decoded, the NMEAOnSerial.String can be further processed by routing it to some other component that makes use of the data.
Get started with CDP Studio today
Let us help you take your great ideas and turn them into the products your customer will love.