Seatex MRU Setup Guide
Introduction
This guide demonstrates how to set up the SeatexMRUIO.SeatexMRUIOServer to make a Kongsberg Seatex MRU send some data values to the SeatexMRUIO.SeatexMRUIOServer in CDP Studio, the independent automation software for open PC-based real-time distributed control systems. This example requires a Kongsberg Seatex MRU (2,3,5,5+,D,E,H or compatible).
Set up a Test-system
First we set up a System that the component can be tested in:
Create a system named SeatexTest with a Console application named SeatexTestApp, then select Configure mode. See How to Create a system for more information.
Adding a SeatexMRUIOServer Component
- Select the SeatexTestApp that resides under SeatexTest in the Project tree
- Select the SeatexMRUIO in the Resource tree
- Double-click on SeatexMRUIOServer to add it:
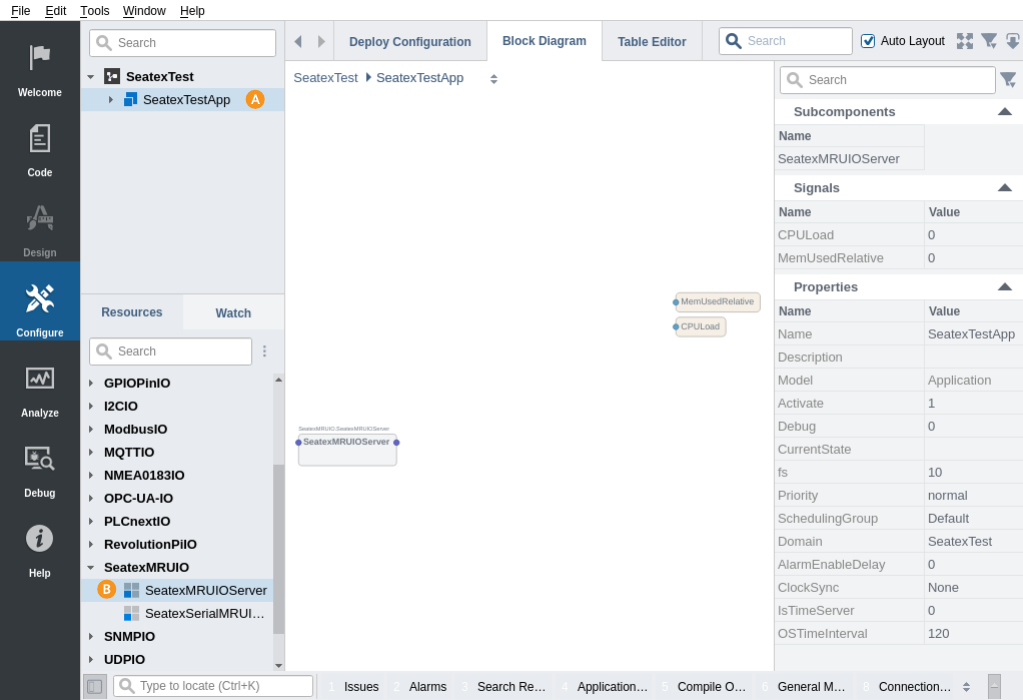
- Double-click the newly added SeatexMRUIO.SeatexMRUIOServer in the Block Diagram to navigate into it
- Double-click the NetworkTransport to be able to configure the transport
- In the Transport table, set ListenPort to 7551 and RemotePort to 7550
- Set RemoteIP to the IP Address of the MRU
- Set LocalName to the networkinterface name that the MRU exists on

Add Channels to Receive from the MRU
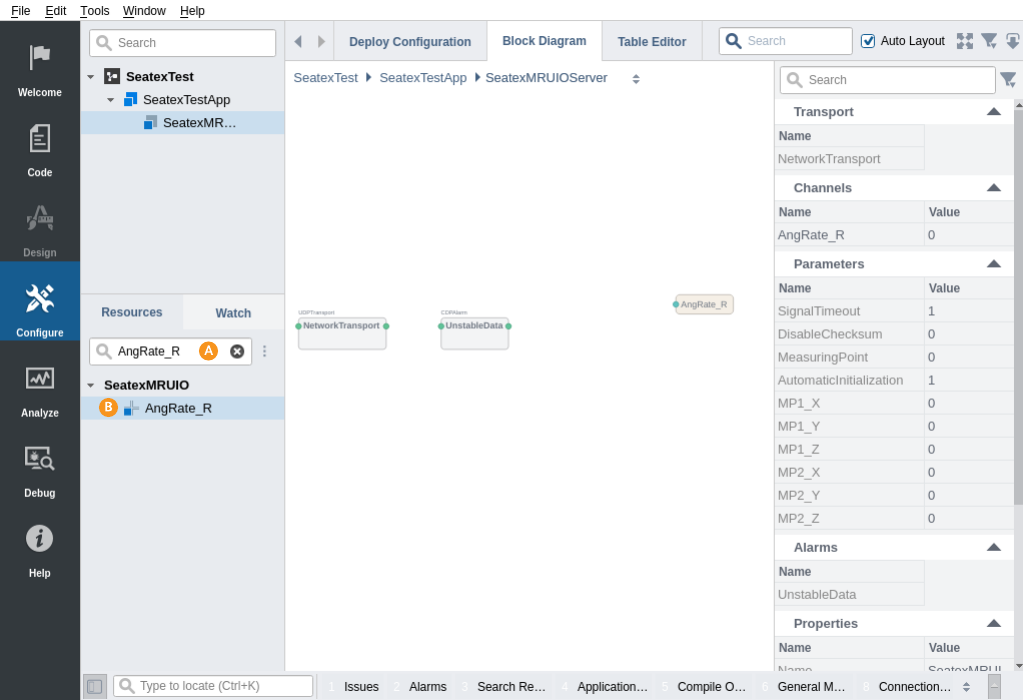
- Make sure that the SeatexMRUIOServer component is selected in the Project tree, and that the Channels table is visible
- Select the Resource tree Search Filter and type in AngRate_R
- Double-click AngRate_R inside the SeatexMRUIO resource in the Resource tree to add it
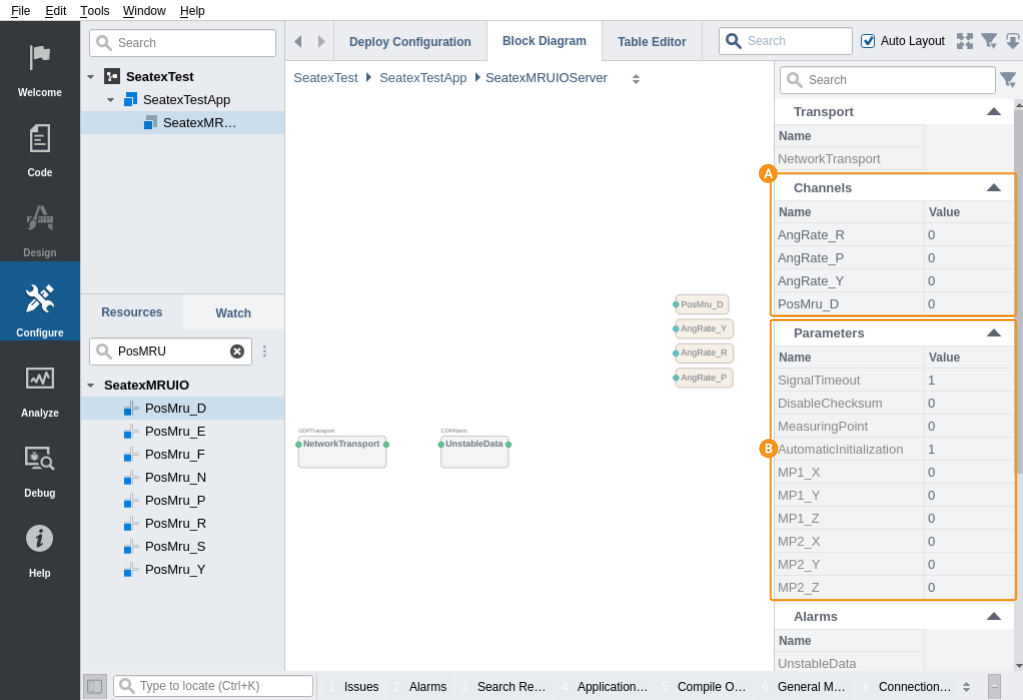
- Search and add AngRate_P from the SeatexMRUIO resource
- Search and add AngRate_Y from the SeatexMRUIO resource
- Search and add PosMRU_D from the SeatexMRUIO resource
- The complete configuration should look like this :
Automatically Configure Seatex MRU
To make the Seatex MRU send out the values that you have configured, you can set the parameter AutomaticInitialization to 1. This will overwrite the MRU configuration to tell the MRU to send out the configured signals at the SeatexMRUIO.SeatexMRUIOServer frequency (fs property). If you change AutomaticInitialization while the application is connected and running, make sure to send a Reinitialize message or to restart the application for the change to propagate to the MRU.
Note: Be careful when changing AutomaticIntialization to 1. If there are multiple consumers of the MRU signal, some of them might not have the correct configuration to receive the data.
Note: Make sure that the physical interface that the MRU is on is selected in the Networks table, or communication with the MRU will not function properly.
Configure MRU Communication Token
It is important to set the CommunicationToken property to the correct value, as this is part of the telegram header. See Communication Token for more information.
How to Run the Tutorial
To run the tutorial from CDP Studio, select Configure mode, right-click on the system project and select Run & Connect. See the Running and Connecting to the System tutorial for more information.
Verify That It Works
- Click into SeatexTest.SeatexTestApp.SeatexMRUIOServer
- Observe that the values sent from the MRU change
- Add PosMRU_D to Analyze mode by right-clicking on the Channel, then select 'Add to plot' -> Tab -> Untitled
- Click Analyze mode, move the MRU up and down and observe the changes in value
- Stop the system by Right-clicking the SeatexTest in the Project tree and clicking Stop
Get started with CDP Studio today
Let us help you take your great ideas and turn them into the products your customer will love.