Diff Tool
Introduction
After a CDP system is deployed to a remote device, its configuration might in time get out of sync with the local project configuration. This will happen when doing changes on the running system or when developing the local project. CDP Studio includes a tool to compare and merge the remote and local configurations.

Opening the Diff View

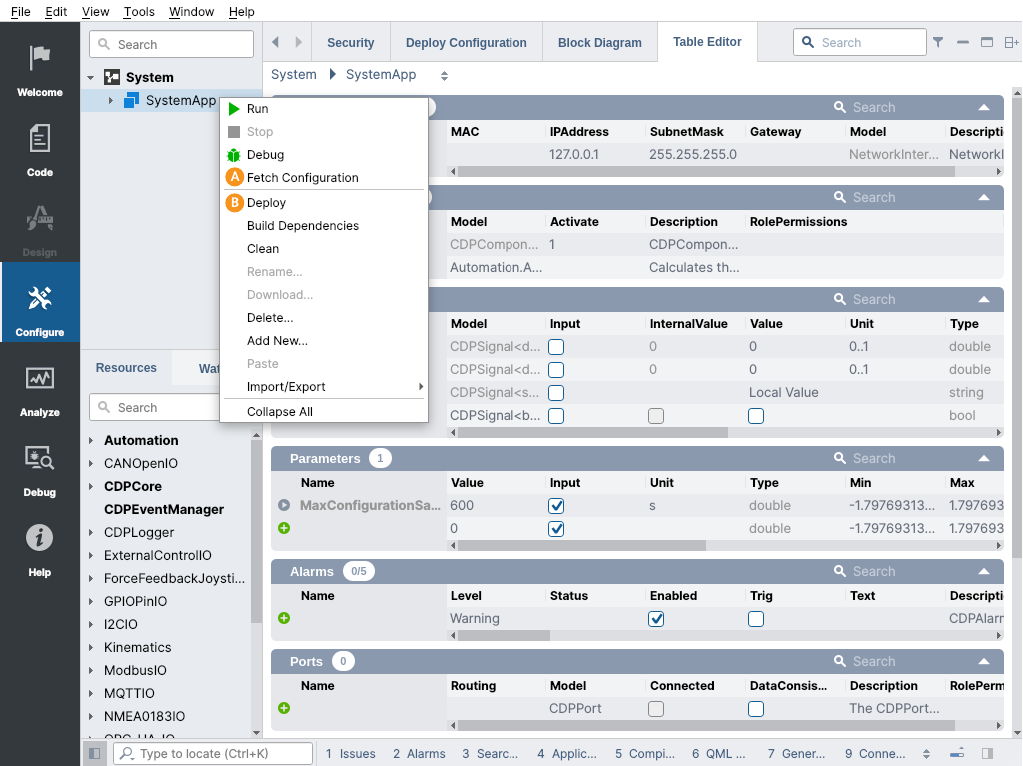
- To fetch changes done on the running system (for example changes done while connected with CDP Studio), right-click on the system and select Fetch Configuration. This will open the diff view.
Note: It is possible to compare your project with a custom folder. Just modify the Deploy directory in the Deploy Configuration tab before clicking Fetch Configuration.
- To deploy changes done on the local project to the remote device, right-click on the system and select Deploy. A confirmation dialog will appear where one of the options is Merge. Click it to see and select the modifications that would be applied to the remote device.

The Deploy Configuration dialog. Click Merge to open the diff tool.
The Diff Dialog
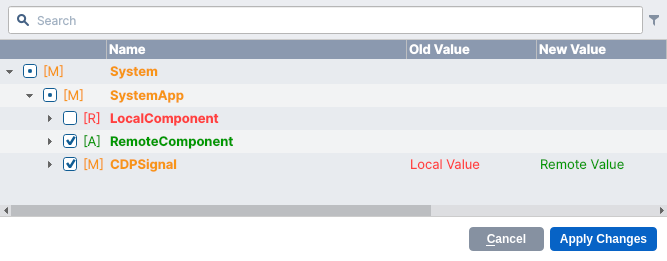
The diff view dialog show the differences between remote and local configuration in a tree view.

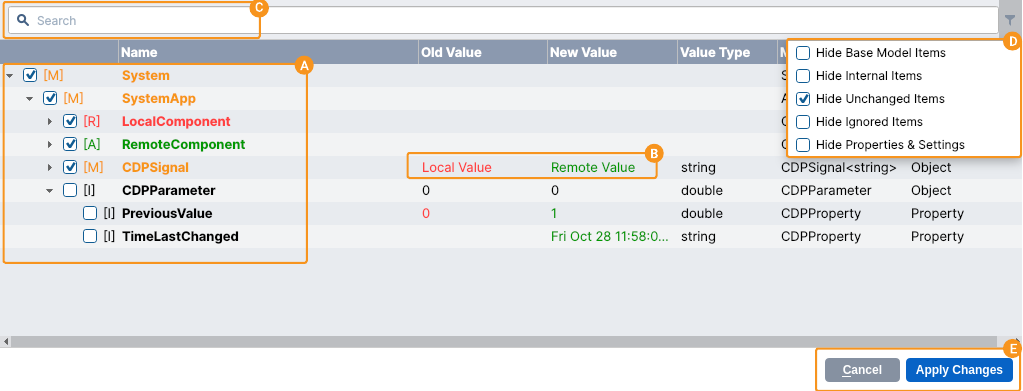
- Colors and text markers are used to visualize added, removed and modified nodes:
- [A] - added. This node will be added after clicking Apply Changes. If the diff dialog was opened while fetching configuration from a remote device, it will be "added" to the local project. But if it was opened while deploying to a remote device, the "added" means that it will be added to the remote device.
- [R] - removed. This node will be removed after clicking Apply Changes.
- [M] - modified. Either the value of the node is modified or at least one of its children is added/removed/modified.
Note: When it is unclear why the node is marked modified, try to disable filters shown at and .
- [I] - ignored. The modifications of this node will not be applied. All nodes marked with the IgnoreInDiff modifier in the model will be ignored during the merge. The modifier is useful for not fetching things like timestamps or machine counters which would just clutter the version control diff view.
Note: Ignored nodes are by default unchecked but it is still possible to manually check the items to include them in the merge.
The checkboxes in front of each modified line can be used to only accept some changes done to the system. Uncheck any item and it will not be modified when clicking Apply Changes at .
- - The old and new value of the node. When clicking Apply Changes, the new value (marked with green color) will be applied to the configuration. Note that it is possible to modify the new value in this dialog.
- - Allows filtering the nodes by the Name column. Type in your search and press
ENTER. - - Common filters to help reduce the clutter in the tree view:
- Hide Base Model Items - this hides all nodes that are inherited from node's base model except nodes having Important flag (or DisplayHint="Important" in model).
- Hide Internal Items - when enabled, nodes having the Internal flag (or DisplayHint="Internal" in model) are hidden from the view.
- Hide Unchanged Items - when enabled, only modifications are shown in the tree view. System and application nodes are always listed even when there are no modifications.
- Hide Ignored Items - when enabled, hides nodes which are modified but marked with IgnoreInDiff in the model.
- Hide Properties & Settings - when enabled, hides all children of type CDPProperty or CDPSetting.
- When done viewing changes, either click Apply Changes to accept the selected modifications or Cancel to keep the old configuration.
Get started with CDP Studio today
Let us help you take your great ideas and turn them into the products your customer will love.