CDP Studio - Configure Mode Manual
Configure Mode
The purpose of configure mode is to allow the user to view and modify system configuration by adding or removing items (nodes) to/from configuration, connecting items through routings and setting/monitoring values, managing application deployment and security configuration. There are several views available in Configure mode:
| Security | A view for security settings. |
| Deploy Configuration | A view for deployment settings. |
| Block Diagram | A function block diagram based view. |
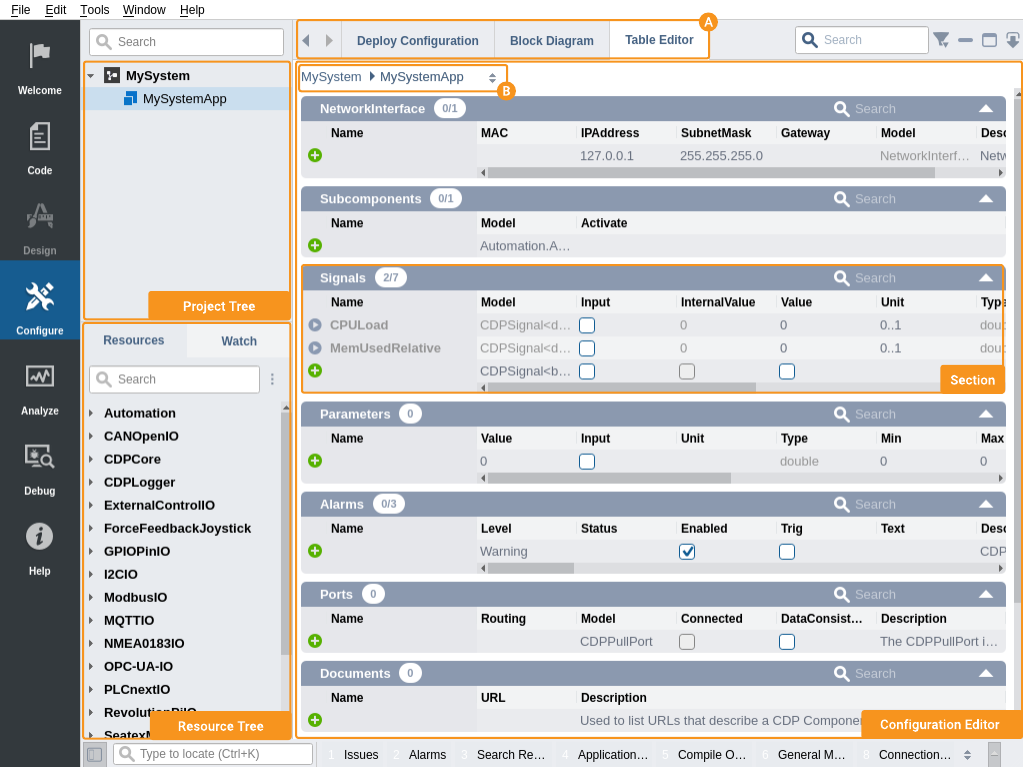
| Table Editor | A table based view of configuration. |
| DHChain Visualizer | Visualizer of kinematic link chains (Denavit-Hartenberg). |
| Diff Tool | Compare the configuration of a local project with the configuration deployed to a remote device. |
The DHChain Visualizer view will only appear when a Kinematics.DHChain is added and chosen.
Layout
The Configure mode consists of
- Toolbar that contains back and forward buttons, Editor Selector, location bar, Search Filter, and Editor buttons
- Editor area that can be used to switch between the views.
- Project tree with its own Search Filter
- Resource tree with its own Search Filter
- Configuration editor shows the view selected by Editor Selector
Resource Tree
Contains resources that can be added to selected item (node). When adding a resource, the library containing the resource is automatically added as an application dependency and thus deployed together with the application. In cases where resources are only required during run-time, there is a possibility to manually add the library as a dependency without the need to use them beforehand. This can be beneficial when some resources are not used in development phase but become useful in production e.g operators for signals.
Just right click on the top level resource (library) to open up context menu and click "Add as Dependency". Note that all library dependencies that this application has, are shown as bold.
To remove the dependency choose "Remove as Dependency" from the same menu. Be aware that this will fail if the application still has resources it uses from that particular library. All usages are required to be removed first, to be able to remove the dependency.
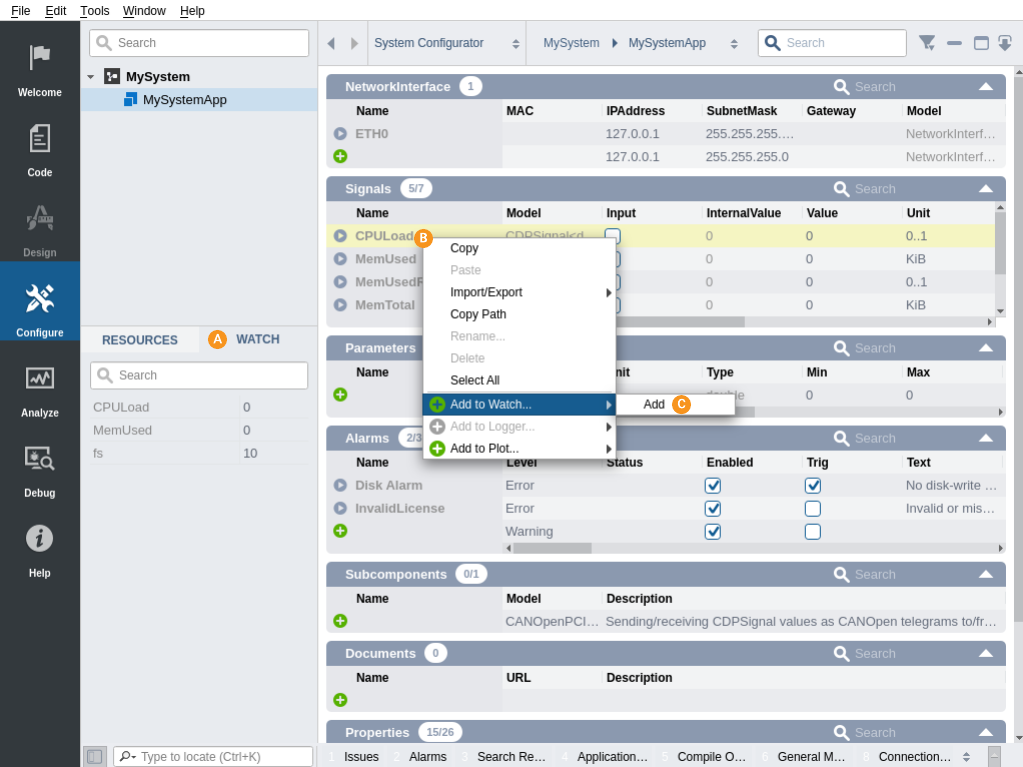
Watch List
Watch list allows quick access to objects like signals, parameters, messages, components, etc. without the need to look for them in system's hierarchy. All objects act as bookmarks and can be navigated to with double click. In addition objects that have a value can be edited in place. Watch list can be found next to Resource tree .
To add an object to Watch list, simply drag any object from Configuration editor and drop it on Watch list. Alternatively you can open context menu by right clicking on an object , selecting "Add to Watch..." and then "Add" .
Copy/Paste and Export/Import of Configuration
In case you need to configure set of similar objects (for example multiple signals all having similar operators), you can simplify the task by creating and configuring only one of the objects and then duplicating it with copy and paste functionality.
To copy an object, right click on it in Project tree or Configuration editor section and choose Copy from the context menu. This will copy all changes made to the object (or object tree) to the system clipboard.
Alternatively, you can choose Import/Export->Export... to output these changes to file.
When multiple rows are selected in Configuration editor table, copy or export will apply to all of them.
To paste or import configuration, right click on the object you want to paste or import into in Project tree or Configuration editor section and choose Paste or Import/Export->Import... from the context menu. Alternatively, you can paste or import new member into the object list by clicking on the empty name column on "add new" row (next to the button).
Note: Copy and export will copy only changes to the object model default values. In other words, it will not copy any property or subelement of the object that is not changed by you (compared to the model default value).
This means that default values are not overridden on paste/import destination. For example, if you do Copy on CDPSignal with Input="0" (unchecked) and paste it into a component which contains CDPSignal with same name but has Input="1" (checked), then the paste target signal will remain as Input="1" because Input="0" was CDPSignal default value and therefore was not copied.
On the other hand, if you do Copy on CDPSignal with Input="1" (checked) and paste it into a component which contains CDPSignal with same name but has Input="0" (unchecked), then the paste target signal will become Input="1" as it is not CDPSignal default value and therefore was copied.
You can export large sets of configured objects or object trees into export file for later use with import.
Export file is actually text file that contains lines with configuration changes to be applied. Export file has following columns:
- CDP version number
- object path
- object model name
- object value
You can choose between two export formats:
- Comma separated file (*.csv)
- Tab separated file (*.tsv)
Note: Copy/paste and export/import might fail or cause unpredicted results when done between different CDP versions. In such cases, it is always a good idea to paste into a file, review the file manually and then copy it to CDP Studio.
If copy or import encounters situation where destination object is already existing, then popup message will ask you for conflict resolving strategy to use. There are 4 strategies to choose from:
- Add - will add the conflicting object as a new object (by adding number at the end of the original name)
- Replace - replace the conflicting object (remove original and add new from paste/import)
- Merge - keep the conflicting object as is and paste/import content properties or subelements into it
- Skip - do not paste/import the conflicting object and its properties nor subelements
Table Copy
In addition to the standard copy/paste of configuration, the Table Editor and Block Diagram sidebar views offer an additional Copy Row(s) option in the context menu. This will create a shallow copy (without subelements) of the selected rows in a tab-separated table format that can easily be pasted into a spreadsheet application.
See more in the Table Copy section of the Table Editor manual.
How to Change the Model
You can change the model of an editable object after it has been added. This can be done from the following locations, depending on applicability:
- The Configure mode Block Diagram table view
- The Configure mode Table Editor
- The Code mode Code editor, by using the CDP Change context-menu
To change the model:
- Locate the Model property.
- Click on it to open a selection list of available models.
- Choose a new model by clicking on it or pressing the Enter key.
- To cancel, press the Escape key before finalising the selection.
The following steps are executed during the Change Model operation:
- A list of compatible models is presented to the user.
- The user selects a new model.
- An undo-transaction is initiated.
- The system compares the current instance against its model and stores the differences.
- The original instance is deleted, and a new instance based on the selected model is created.
- Compatible differences are reapplied to each matching sub-tree element.
- The new instance is placed at the same location as the original.
- The undo-transaction is finalized. If the user invokes undo, the entire change is reverted in a single step.
- Any warnings are shown in the General Messages pane.
Note: For simple changes (e.g., changing Type from double to int), original data is retained. For example, Value=14.45 (double) becomes Value=14 (int).
Note: For complex changes (e.g., changing IO servers), sub-objects must be verified manually. Changing a ModbusMasterUDP to a ModbusMasterSerial keeps the modules intact, as they derive from the same base. However, changing a ModbusMasterUDP to a ModbusSlaveUDP will cause incompatibility — the original master packets will not be added to a model that only accepts slave packets. In this case, the incompatible changes will be notified via the General Messages pane.
Testing
By running the application on a workstation it is possible to verify that the application performs as expected without having to upload to the controller hardware. This simplifies the process of testing and also allows for testing of the software before the controller hardware is available.
Hardware IO signals can be simulated or, if the hardware I/O is accessible, it is often possible to communicate with the I/O from the workstation as well. Be aware of limited real-time performance when running on Windows platforms and Linux-platforms without Real-time patches and preemptive kernels.
I/O signals can be simulated or overridden manually from the configuration editor.
Adding Applications to the System
To add an application to your system, see the Adding Applications manual.
Cloning Existing Applications
An exact copy (clone) can be made from any existing application. For that, select an existing application from the Project tree and choose Clone... from the context menu. Then enter the clone application name and press the Clone button. After that, a cloned application will appear in the Project tree.
During clone, when you set the checkbox Create read-only re-syncable application, then a special cloned application will be created. The cloned application configuration is read-only and it will be updated from the source application every time the application is deployed. This is useful when you need a copy of the application (for example for redundancy) that is always in sync with the source one. The cloned application can also be manually re-synced without deployment by right-clicking on it and selecting Update From Source from the context menu. The cloned application can be identified by the (Clone of ...) suffix next to the application name in the Project tree and in the Deploy Configuration Applications table.
Note: The application clone creation can automatically create a slightly different application configuration than the original one. Consult the Redundancy Application-Specific Configuration for Cloned Applications manual for more information about that.
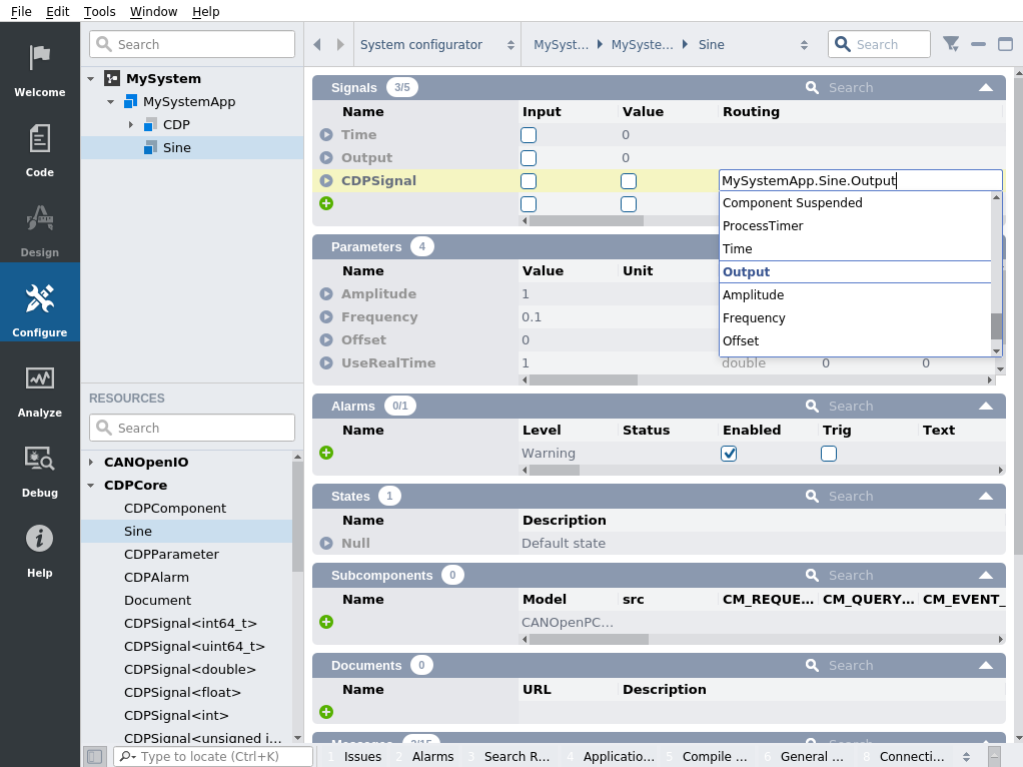
Route Input Signals
Testing can be performed by creating a simulator component, which reflects the outside world for your component. By changing signal routing it is easy to connect to simulated signals or hardware IO as the testing proceeds.
Add a signal from the Resource tree to one of your components and set its routing property to listen to another application. You also need to set the Input flag of the signal.
Running the System
To run the system, right click on the system name and select Run & Connect from the context menu, see Running and Connecting to the System. Once the connection has been established, the user interface will begin showing real-time changes to the structure and values of your system. Note that some configuration options will no longer be available once the system is connected.
Note: It is also possible to select each individual application to run by right-clicking an application and selecting Run. When all required applications are running, it is possible to right-click on the system and select Connect. This will connect CDP Studio to all the running applications in the selected system.
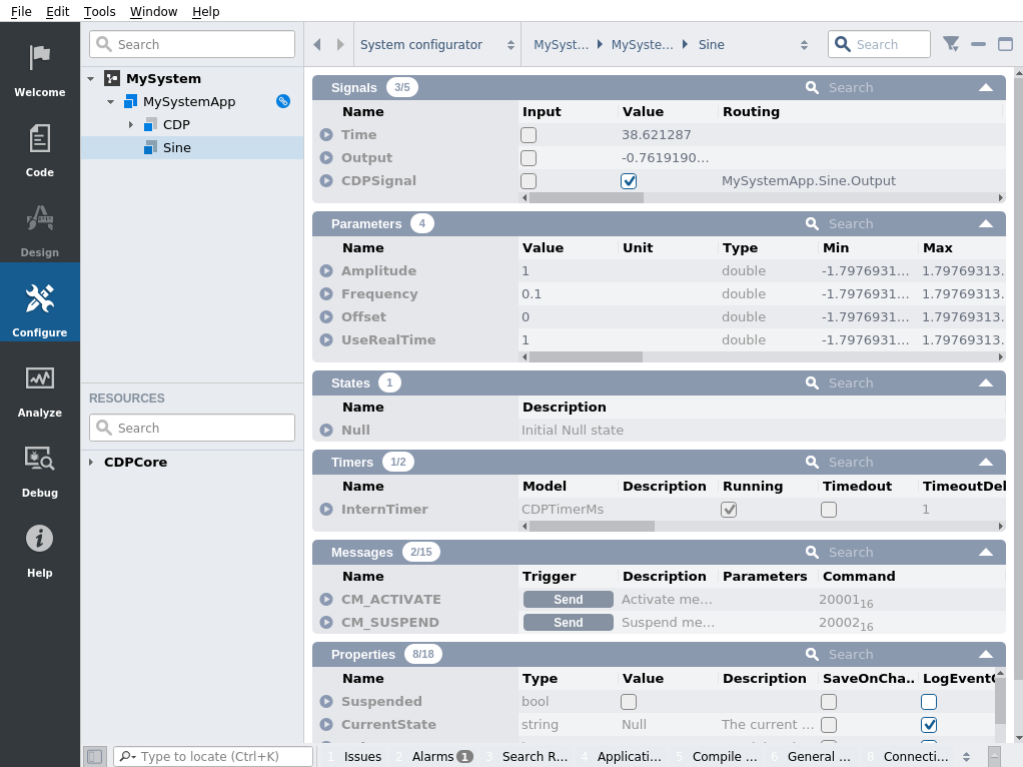
Real time values of the Application signals.
Get started with CDP Studio today
Let us help you take your great ideas and turn them into the products your customer will love.