Connecting Widgets to CDP
Connecting Widgets to CDP
Introduction
Connecting the GUI to CDP requires that the developer has a good understanding of CDPComponents and communication objects like CDPSignal, CDPParameter, CDPProperty, and Message. This makes it easier to understand what widget features/properties must be configured for the different communication types.
For instance, making a CDPComponent change state is usually done using a message handler in the component and a button in the GUI for sending the message. If you rather wanted to switch states using a combo box in the GUI it would have to be done differently. The current combo box doesn't send messages, but toggles a remote value to the index of its selected item. The component will in this case have to check the value periodically and change state if the value changes.
Support for Multiple GUI Applications
The CDP components in the control system do not need to know anything about the GUI. Instead, the GUI connects to the CDP components and pushes values to the routed remote objects. The communication is bi-directional to always keep the widgets synchronized. This makes it possible for multiple GUI applications to connect to the same control system simultaneously.
Widget Properties
The widgets are connected to the various CDP objects by adding routing to communication properties in the widgets. All properties related to communication are prefixed with cdp.
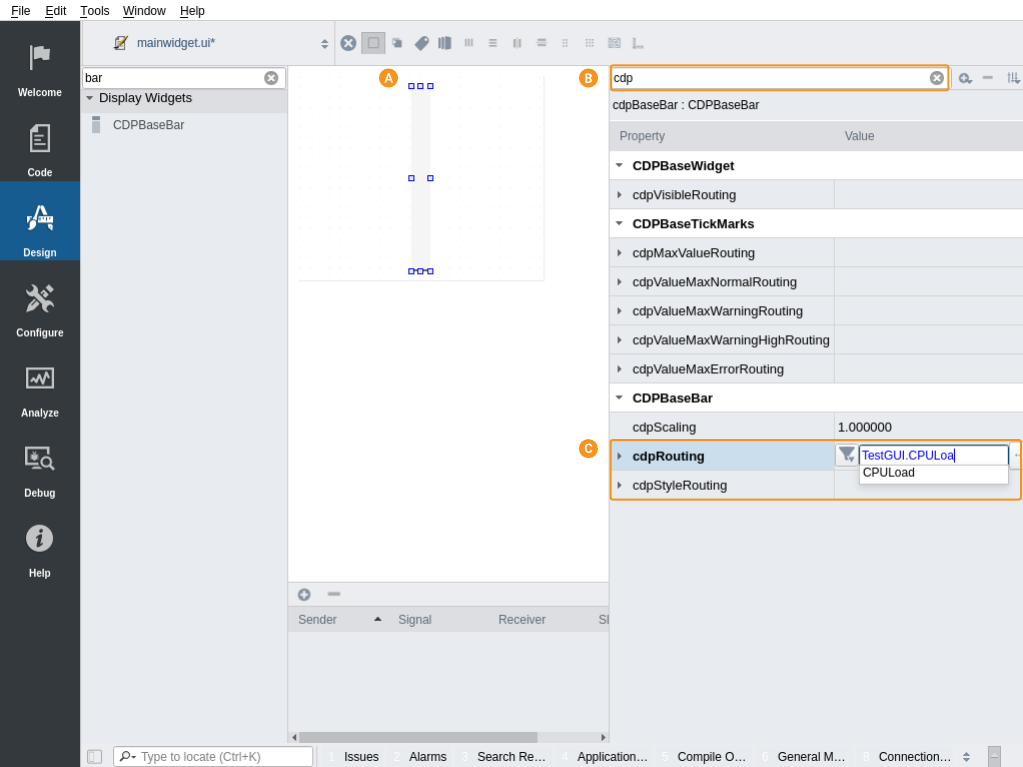
The above image shows how to connect a bar widget to the CDPSignal named CPULoad in an application named TestGUI. First, select the widget that you want to connect as shown in . This makes the property panel show all the properties of the bar. Use the filter at the top of the panel to only show properties related to CDP communication. This is shown in . Finally, we have to add routing to the correct routing property as shown in . The different widgets usually have several properties for setting routing to different features. In the bar widget, it is possible to control features like visibility, maximum values, widget style and current value. The current/main display value of the widgets is usually named cdpRouting without any other explanation, while optional properties like widget style include the feature as part of the name.
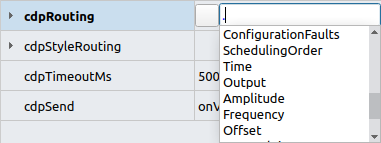
The routing properties use a special editor that auto-completes routings as it is typed . Start typing the name of the application and possible choices will get listed below the editor. It is also possible to filter the list by clicking on the filter button in front of the line edit. Select the object type you want to locate and the list will get filtered.
An alternative method to typing in the object names, is to go in to Configure mode Block Diagram and right-click 'Copy Path' on the object that you want to connect the routing property to. You can then go back to Design mode and paste that copied path into the routing property.
Dynamic Routing
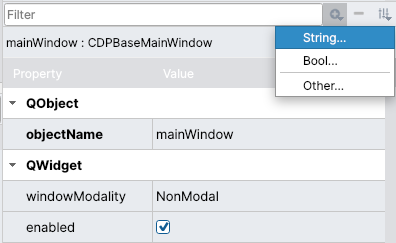
All widgets from CDP Framework version 4.11 and later support controlling widget properties of string or numeric types using Routing. If a widget does not have a pre-defined Routing available for a property, then you can add it as a Dynamic Property of type String in Design mode. Dynamic Properties can simply be added to a widget configuration by clicking the ![]() icon next to the Filter in the property table:
icon next to the Filter in the property table:
Any supported widget property can be controlled by giving the Dynamic Property a name like this: <propertyName>Routing.
Note: Make sure to type <propertyName> to exactly match the name of the property you want to Route, as the property name in front of Routing is looked up (case sensitive) in the widget to attach Routing to it.
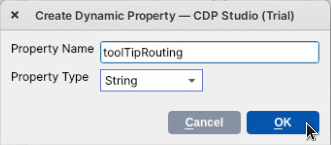
For instance, to control the toolTip property of a widget, select the widget and add a Dynamic Property of type String to it. Give it the name toolTipRouting:
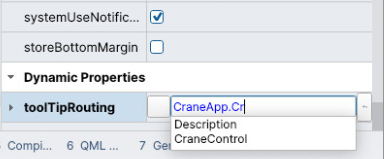
Dynamic Properties are added at the bottom of the widget property table. To configure where to get the toolTip text from, click into the toolTipRouting value and specify a Routing to where the toolTip text should be retrieved from:
To remove a dynamic property that was added in error, select the dynamic property and click the ![]() icon next to the Filter in the property table.
icon next to the Filter in the property table.
Note: A Dynamic Property Routing is always added as a string, regardless of the type of the object it points to. However, not all properties are designed to be changed after startup, and modifying a property via Dynamic Routing may not result in an immediate visual change. Additionally, the target property cannot be part of a group. For example, it is not possible to control Width within minimumSize using Dynamic Routing.
Standard Qt classes, such as QFrame, QWidget, and QScrollArea, and other classes starting with "Q", do not support Dynamic Routing. To verify the class name of a widget after dragging it into the form, check the Object Inspector or the top of the Property Panel.
Relative Routing
The main reason to use relative routing is to make reusable GUI elements, that include multiple routed child elements, and target control system objects with a fixed structure. Making it possible to configure only one routing on a large group of elements saves a lot of time when there are multiple copies in the GUI.
In the CDP Studio Design mode, relative routing is achieved using a Routing Container as a parent container and adding relative routing in the child widgets. The target routing is added in the cdpTargetRouting property of the container and any relative routings in the child widgets are started using a dot (.) character as shown in the below image.
The ordinary Container widget in CDP Studio Design mode also includes the cdpTargetRouting property and can be used as a routing target similar to the Routing Container. The cdpTargetRouting property supports relative routing to enable placing containers within containers.
Messages
Messaging is another way to communicate with objects. Such communication is usually done by having a button send a message to an object. This requires that the object has a message handler for the message we want to send. For instance, to suspend a component, we could use a CDPBaseButtonMsg. Configure its cdpRouting property with the component routing and add CM_SUSPEND in the cdpTextCommand property.
Most widgets are connected to CDP using routings, but there are also special widgets like the CDPEventList that use an internal messaging system to transport information.
Note: More communication examples are usually located in the detailed description of the different widgets.
Signals and Slots
Most widget functionality should be routable to CDP using properties as described in the previous sections. However, if a widget has functionality that is only available using signal and slot connections, we have an alternative for this as well. The Com Widget can be dragged into the form and connected to widget signals and slots using the Connection Mode.
Get started with CDP Studio today
Let us help you take your great ideas and turn them into the products your customer will love.