Intro 1: Connect Variables to HMI GUI
Intro 1: My First CDP Studio Project
The purpose of this example is to give you an introduction to the basic concepts of a CDP Studio, the independent automation software for open PC-based real-time distributed control systems project and how to build and run a project.
This example includes
- A simple system (project) and application
- A pre-made function (a sine generator)
- A simple GUI
- Connections between the GUI widgets and the sine function
This example is the first in the series of Getting Started with CDP Studio.
Step-by-step Guide How the Example Was Made
There is a detailed step-by-step guide showing how the example was made, see Intro 1: Tutorial of Connecting Variables to HMI GUI.
Project Overview
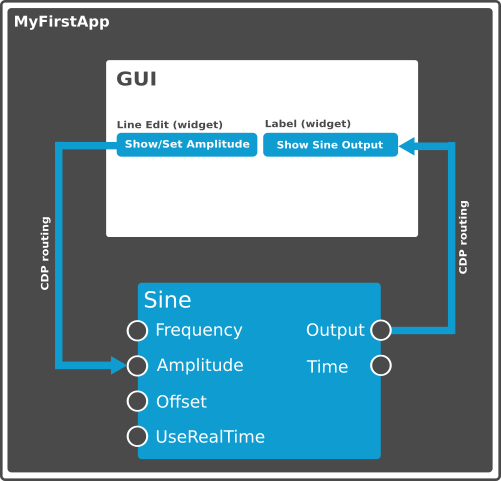
The project consists of a simple GUI that contains 4 widgets (GUI elements) and the Sine component, a pre-made Sine generator. The example allows you to change the Sine maximum amplitude and display the current Sine value using CDP routing to connect the GUI widgets to the Sine parameters and signals.
How to Run the Example
To run the example from CDP Studio, open Welcome mode and find it under Examples. Next, in Configure mode right-click on the system project and select Run & Connect. See the Running the Example Project tutorial for more information.
Project Description
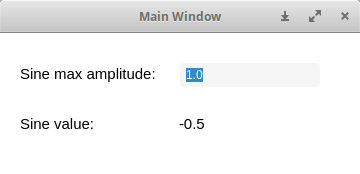
The example contains a GUI and when you run the application, the GUI that appears has 2 widgets, one where you can change the amplitude and one displaying the sine output.
There are some concepts that are important to understand when developing with CDP Studio. Below is useful information related to this example.
Note: Press F1 to get context sensitive help on all functions.
A system (project) contains one or more applications that work together to form a working control system. An application contains a collection of component instances (objects) running on a computer.
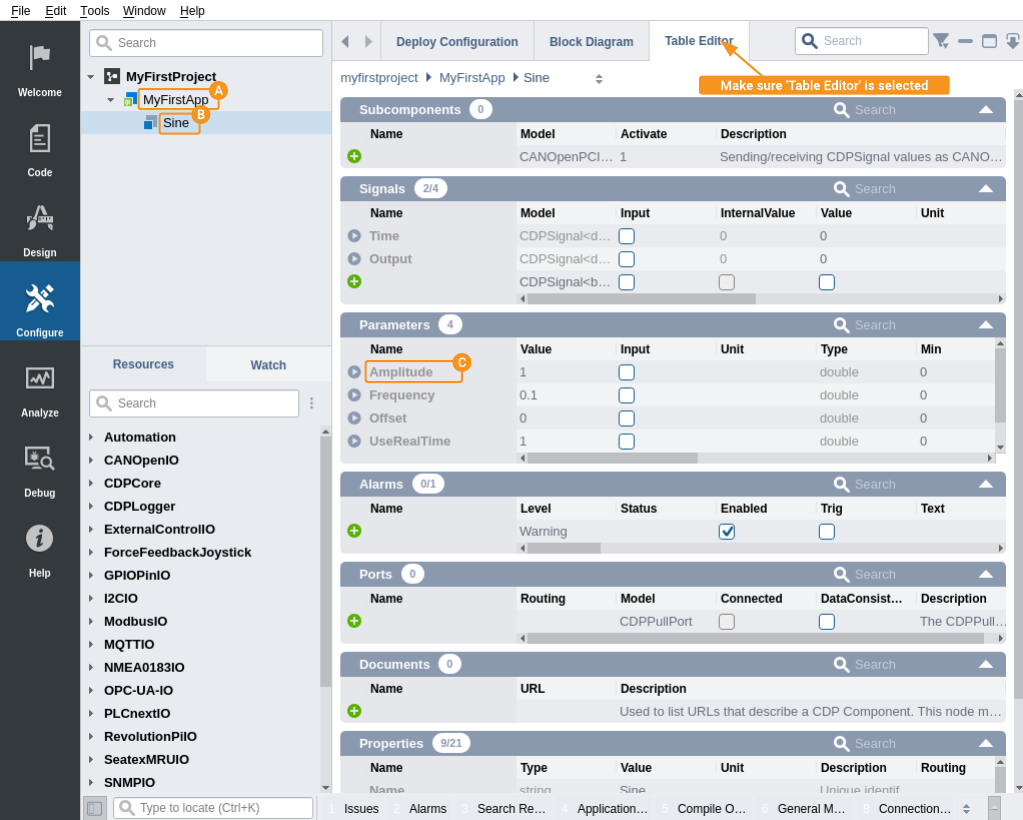
CDP Studio comes with many pre-made resources. Components such as a Sine is an example of this. A component is an object. Objects can be added to an application.
Graphical User Interfaces (GUIs) are made in the CDP Studio Design mode. In this example, CDP Studio Design mode for the GUI looks like shown in picture below (click on MyFirstApp in Project tree, then click on Design mode):
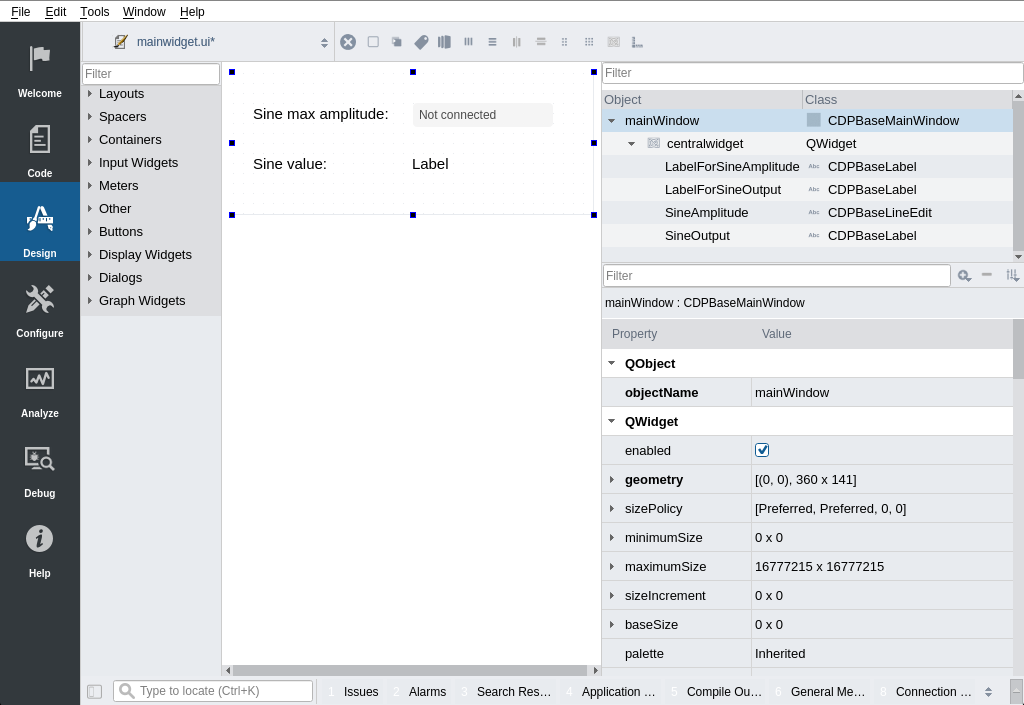
CDP Studio comes with a large set of pre-made widgets. The widgets are grouped according to category, e.g. widgets that are used for user input are grouped together under Input Widgets.
Widgets are added to the GUI by dragging them into the Form Editor (the canvas in the middle of the window), and they can be placed and resized freely. The Form Editor lets you compose widgets in a what-you-see-is-what-you-get WYSIWYG editor, meaning that the GUI that you get when running the application is very similar to what you see in the editor.
The way CDP Studio connects components together, or connects GUI widgets to components, is called routing. This is an important concept in CDP Studio.
The routing to and from the GUI is set up in the GUI itself using the cdpRouting property for each widget. This property is found in the Property editor (lower right side of the window in Design mode). CDP Studio uses name-based routing uniquely defined by the syntax:
<Application>.<component>.<possibly-more-objects-inbetween>.<property>
For the ‘Line Edit’ widget (‘SineAmplitude’ object):

Note: All names in CDP Studio are case sensitive!
Below, the tree-structure of the application is shown in the upper left view. It also shows how the routing can be composed by the names indicated by , and , to form the cdpRouting shown above.
Note: Value is a property inside Amplitude that carries the numeric value of the Amplitude. When selecting the routing, .Value is appended by the routing-selector unless another property is explicitly selected.
Get started with CDP Studio today
Let us help you take your great ideas and turn them into the products your customer will love.