Using Kinematics to Control Robotic Arm
Using Kinematics to Control Robotic Arm
The following example shows how to use the DHChain component to model a robotic arm using Denavit–Hartenberg parameters.
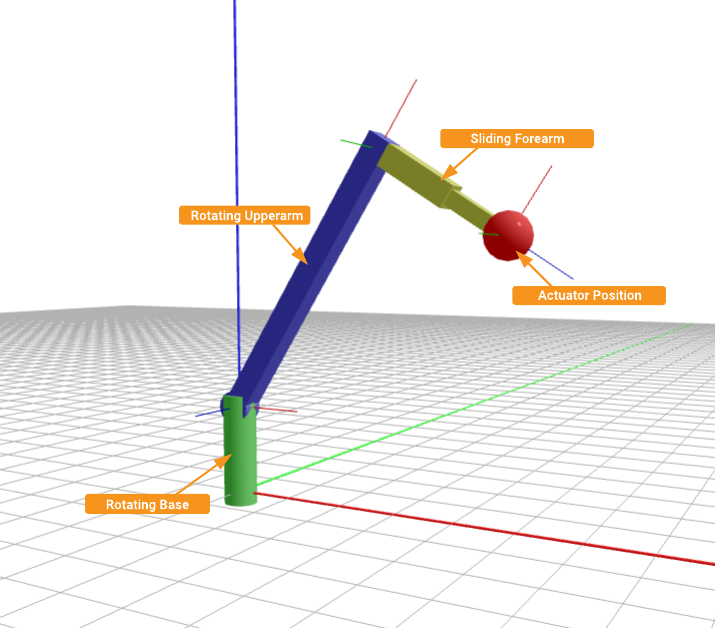
The robotic arm used in this example consists of a base that can freely rotate around its joint axis, a rotating arm that is connected to the base and can rotate up and down, and a forearm that is jointly fixed to the arm but can freely slide to become longer or shorter, as illustrated in the picture below.

The goal of the example is to demonstrate how the DHChain kinematics calculation component can be used both for forward and inverse kinematics calculations of the robotic arm. It also demonstrates how the actuator movement speed can be limited while doing the new position calculations for movements.
How to Run the Example
To run the example from CDP Studio, open Welcome mode and find it under Examples. Next, in Configure mode right-click on the system project and select Run & Connect. See the Running the Example Project tutorial for more information.
How to Use The Example
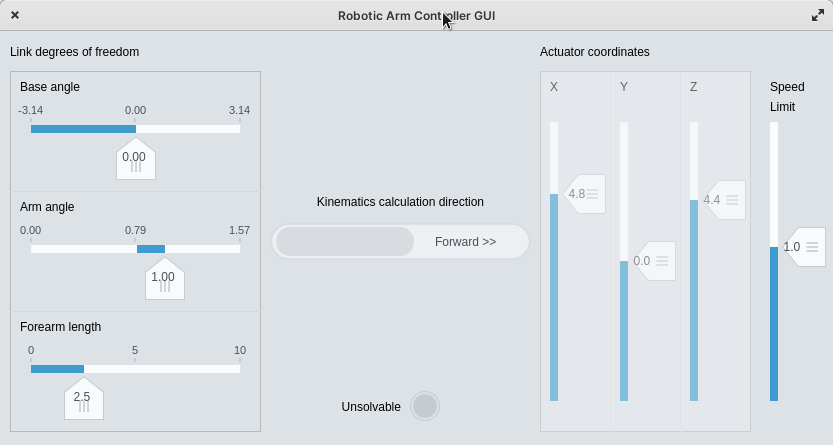
To make it easier to manipulate the robotic arm a GUI is created that can be used to move the robotic arm using position slider widgets.

Initially, after starting the application, it will be set to forward kinematics calculation mode, meaning that the link degrees of freedom values can be changed and the DHChain component will calculate the actuator coordinates.
Experiment by changing any of the degrees of freedom and see how the actuator coordinates change. Change also the Speed Limit slider to get slower or faster movements for the actuator.
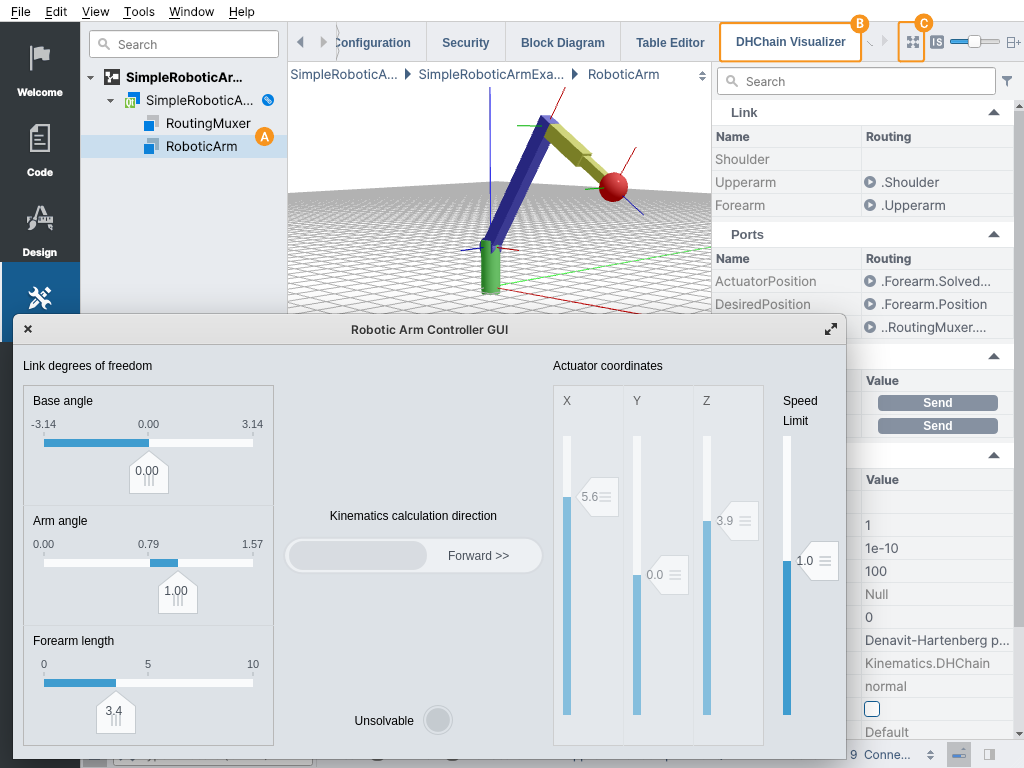
To better visualize the robotic arm you should also switch to DHChain Visualizer in the CDP Studio, by selecting the RoboticArm component and switching to the DHChain Visualizer tab. When not all the links are fully visible you may need to click on the Fit in view button .

How to Use Inverse Kinematics
For convenient kinematics calculation direction change, a toggle button is added to the GUI.
After toggling the toggle button, routings inside the DHChain will be changed so that DHChain starts to calculate in inverse mode, meaning that actuator positions can be changed (are in input) and corresponding link degrees of freedom values will be calculated so that the actuator will position at the specified position.

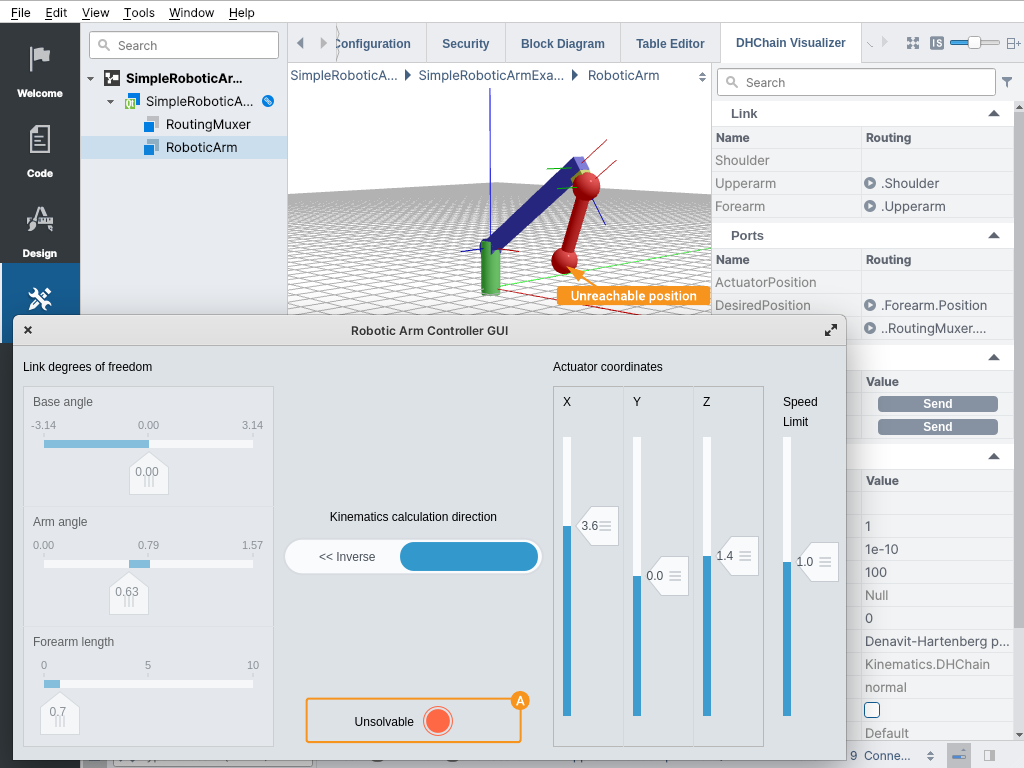
Experiment by changing any of the actuator coordinates and see how the link degree of freedom values change. Note that the arm does move to the set coordinate not instantly but with a speed set by the Speed Limit slider. Note also that due to the nature of the robotic arm, not all actuator positions are "reachable".
Unreachable positions can be detected by:
- link degrees of freedom values do not change
- Unsolvable lamp indicates that DHChain is in an Unsolved state
- CDP Studio DHChain Visualizer shows two red dots connected with the cylinder as an indication where the actuator position currently is pointing and where it is "instructed" to move (but unreachable)
Get started with CDP Studio today
Let us help you take your great ideas and turn them into the products your customer will love.