CDP Studio - Code Mode Manual
Code Mode
The Code mode is where the user creates his own libraries, into which the CDP application system logic and functionality is implemented into components. A library consists of one to many components.
To use the Code mode, a library must be created first. See Configure Mode Manual and How to Create a Library.
Adding CDP Component Model to a Library
To add new CDP Classses:
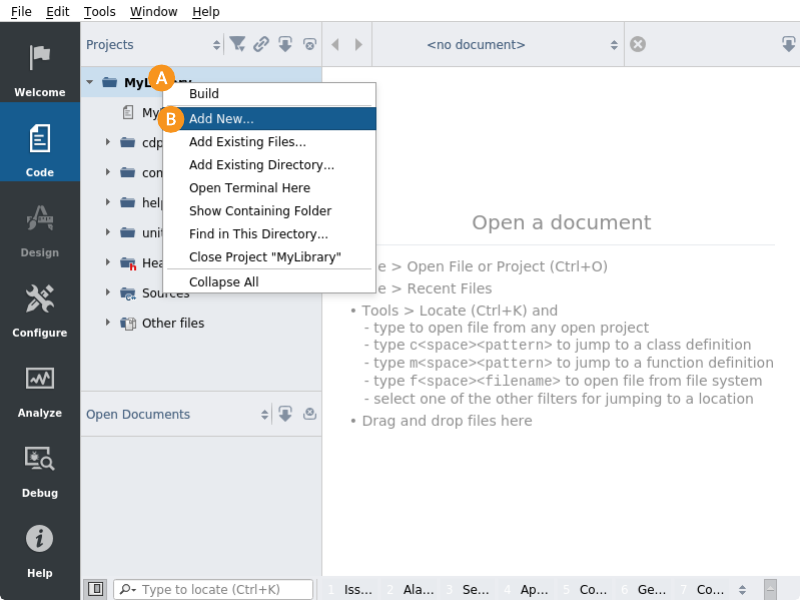
Right click on a library and
Select Add new... option in the context menu.
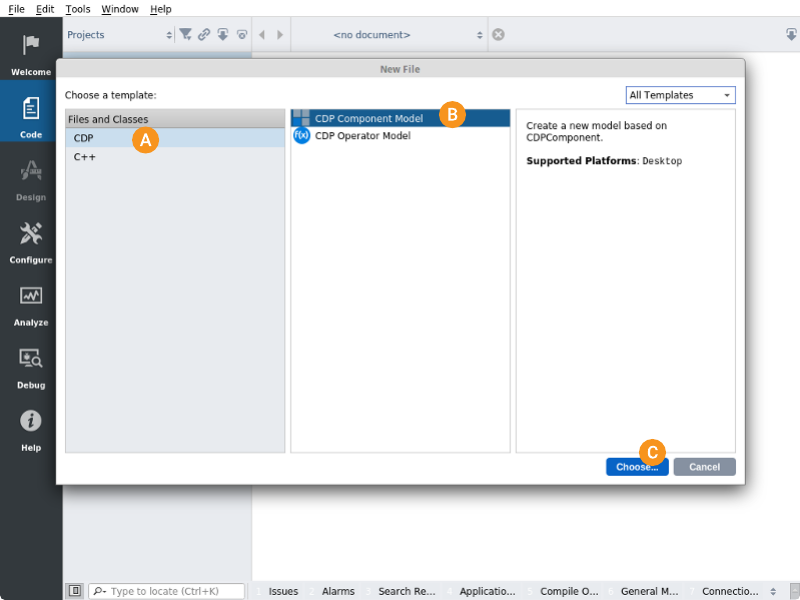
Select CDP from the left column.
Select CDP Component Model from the middle column.
Click Choose...
- Type in the name (e.g. MyClass and a description for the class.
- Add the created files to your version control system or just click "Finish".
An empty component model has been created. The files MyClass.cpp and MyClass.h have been created.
The following functions have been autocreated in MyClass.cpp/h:
| Function | Description |
|---|---|
| MyClass() | Constructor. The first function to be called. Used to initialize member variables. |
| ~MyClass() | Destructor. The last function to be called. Typically used to clean up when stopping, like freeing allocated memory. |
| Create() | Creates the component instance and other CDP objects. Called after constructor. |
| CreateModel() | Creates a model instance for this class and fills model data. Registers messages, states and state transitions. |
| Configure() | Configures the component by reading the configuration. Called after Create()/CreateModel(). |
| ProcessNull() | Will be called periodically (after Configure()), with the priority and frequency as specified. If the component is simple, all processing-code may be put into this function. Often more states are added, see example in Library. |
In MyClass.h, the member variables requestedState, ts and fs are also declared (found in base class CDPComponent). requestedState is used when wanting to go to another state, see example in Library. ts is the component sampling period in Seconds (1/fs). fs is the component sampling frequency in Hz (how often the Process-function will be called). In top of MyClass.h, header-files for some of the basic CDP classes are included, so they are ready to be used. You find more info about these classes here: CDPComponent, CDPComponent Class, CDPSignal Class, CDPParameter Class and CDPAlarm Class.
To show storing folder of the new files, right-click on a file and choose "Show Containing Folder"/"Show in Explorer". The new model can create, configure and destroy itself.
Code Generator
The code generator is available when the header or the source of a class that inherits the CDPComponent class is opened. The following elements can be added to the class:
- Signals
- Connectors
- States
- State transitions
- Messages
- Parameters
- Alarms
- Properties
- Ports
Right click on an empty space in code editor.
Select suitable element from CDP context menu.

Generating a State code in a class.
Keyboard Shortcuts
You can assign custom shortcuts to actions that the menu items would toggle. Keyboard shortcuts can be assigned by navigating into Edit -> Preferences -> Environment -> Keyboard.
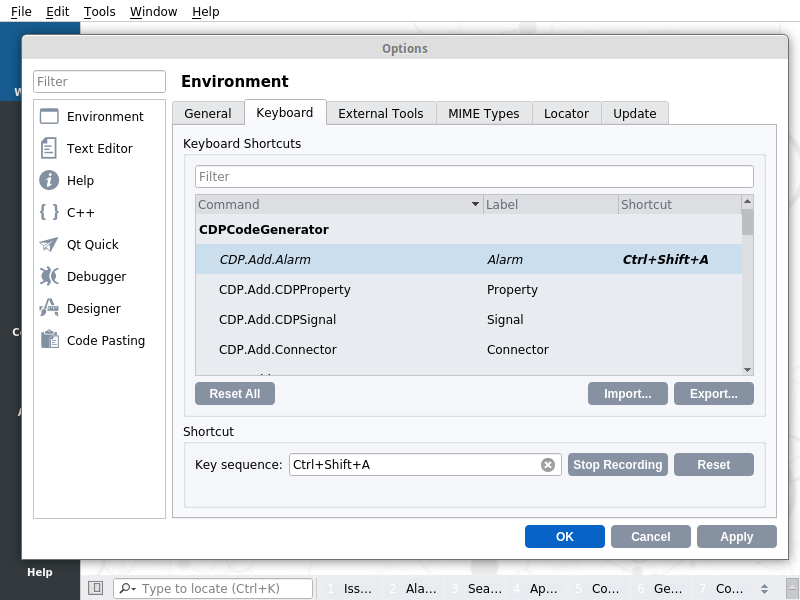
Assigning a keyboard shortcut for generating an Alarm code.
Working with Library from Configure Mode
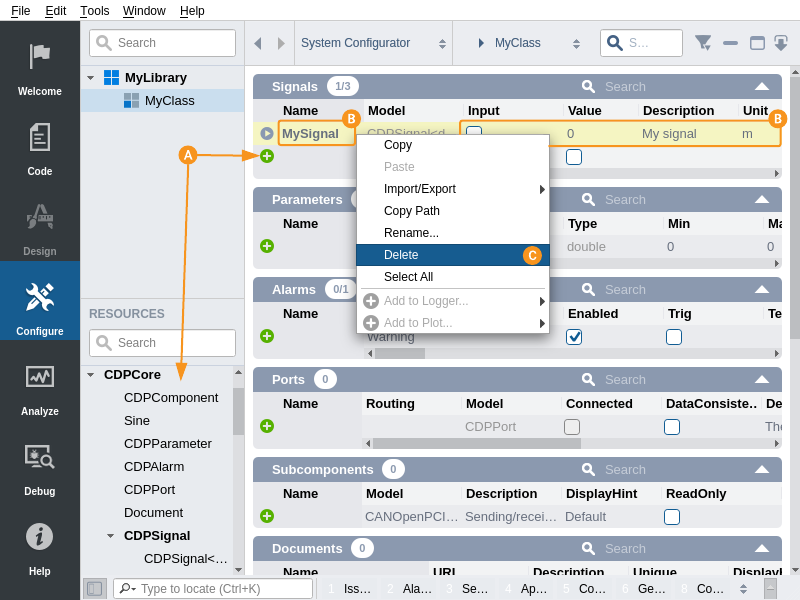
You can conveniently modify library components and elements (like Signals, Connectors, etc) and their C++ code also via Configure mode:
- add new elements via sign or by adding resources from resource panel. Corresponding C++ code is added automatically, just like in Code mode.
- change element properties or rename them simply by entering new values into corresponding table cell. Corresponding C++ code change is applied automatically.
- switch from Configure mode to Code mode into corresponding model C++ class code editing by pressing key F2 on keyboard
- delete elements via Configure mode Delete context menu
Note: When deleting elements with via Configure mode, the corresponding C++ code is also deleted automatically, just like in Code mode. You can Undo code changes only if you had corresponding C++ code opened in Code mode before deletion. For variables, usage of the deleted variable is left untouched so it is possible to update the logic where the variable was used.
Changing the Model
You can change the model of an object after it has been added. This can be done in the Code mode Code editor, by using the CDP Change context-menu. The model can also be changed from Configure mode, see How to Change the Model for more information about this.
Build and use the Library
To build and use the Library, see Build the Library and Use the Component in your project.
Unit Testing
CDP Studio provides helper wizards to add testing capabilities to your libraries. For more details see Unit Testing.
Github Copilot
For advanced users who spend a lot of time in the Code mode, CDP Studio supports GitHub Copilot - an AI coding assistant that helps you write code faster and with less effort.
For more details see the GitHub Copilot manual.
Get started with CDP Studio today
Let us help you take your great ideas and turn them into the products your customer will love.