How to Create a Library
The components you develop using Code Mode are placed in libraries.
This short tutorial shows you the basic steps how to
- Create a new library
- Add a new component model to the library
- Add 2 signals and 1 alarm to a component
- Add some logic in the component
- Select toolkits and build a library
- Use the component in a project
Creating a Library
- In Welcome mode select the Projects tab and click New Project button. Alternatively open File menu and choose Create New....
- Select CDP Library and click Choose....
- Type in the name of the library (e.g. "MyLibrary"), select the storage location and click Next. Note that the name will also show in Resource tree after library is built, similar to how CDPCore and other resources are shown.
- Select CDP version to be used and click Finish. The library created will only be available for system projects using the same CDP version.
An empty library has been created. Now you can add CDP component models or CDP operator models to the library.
Adding a Component Model
To add a Component Model to the library, hover the mouse over the library name in the Project tree, right click and select Add New.... In the wizard select CDP Component Model and name it "MyClass", see Adding CDP Component Model to a Library for more help on creating components.
Add Signals and Alarms
Now add 2 signals and 1 alarm to the component.
First you need to select the component model file.
- Select Code mode and open Sources
- Double click on the "MyClass.cpp"

Open the add signal wizard by:
- Right click on empty space.
- Select "CDP" -> "Add" -> "Signal"
- Check the "Create Another" checkbox
Create two signals:
| Name | Type | Input |
|---|---|---|
| InputSignal | double | X |
| OutputSignal | double |
The input flag on InputSignal is needed so that another signal can be routed to it later. After the two signals have been added, MyClass.h and MyClass.cpp are automatically updated by the code generator. InputSignal and OutputSignal are declared in the protected section in the h-file:
CDPSignal<double> OutputSignal;
CDPSignal<double> InputSignal;
InputSignal and OutputSignal are created in MyClass::Create() in the cpp-file.
OutputSignal.Create("OutputSignal",this);
InputSignal.Create("InputSignal",this);
Create one alarm:
- Right click on empty space.
- Select "CDP" -> "Add" -> "Alarm"
- Name the alarm "MyAlarm" and click "OK"
After the alarm has been added, MyClass.h and MyClass.cpp are correspondingly updated.
Adding some logic and an alarm to the component
Now we add some logic that calculates the OutputSignal from the InputSignal and sets an alarm on a specific condition.
Lets calculate the absolute value from InputSignal and set the alarm if InputSignal is larger than 10.
- Change the ProcessNull() function code:
void MyClass::ProcessNull()
{
    if (InputSignal < 0)
    {
        OutputSignal = -1.0 * InputSignal;
    }
    else
    {
        OutputSignal = InputSignal;
        if (InputSignal > 10)
        {
            MyAlarm.Set();
        }
    }
}
Build the Library
To be able to use the new component in a system, the library must be built for the target hardware you want to run it on. E.g. if you want to run the project on a PLCnext controller, the library must be built with the PLCnext toolkit.
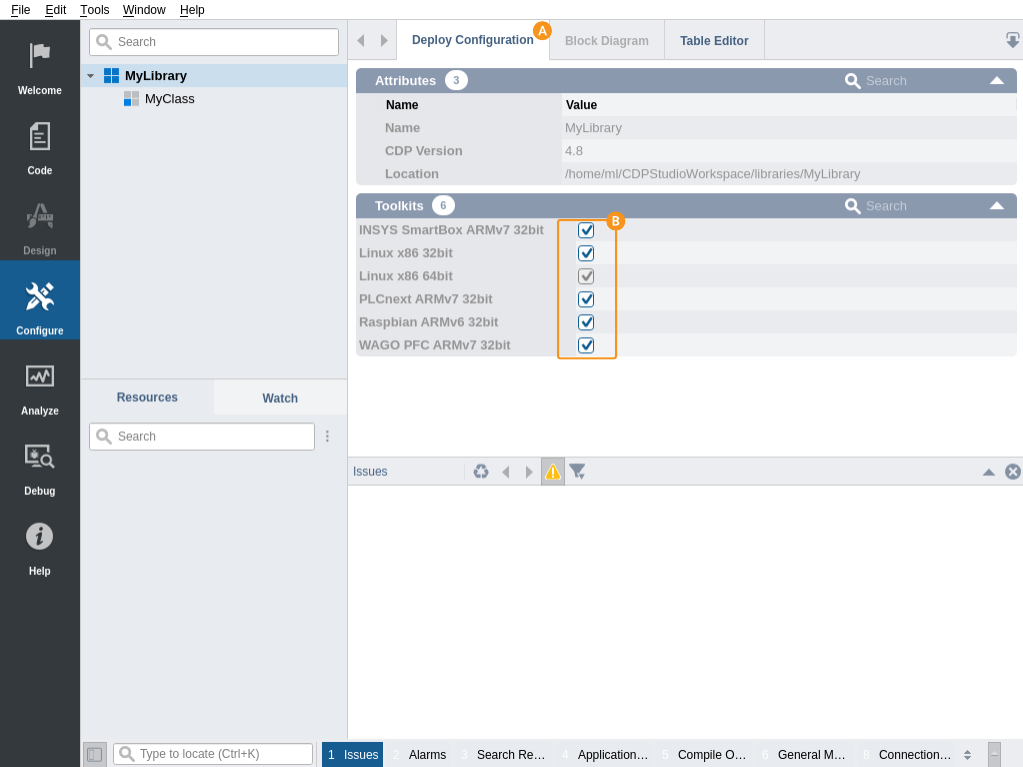
The Toolkit can be selected in Configure mode by first clicking on the Deploy Configuration , and then make sure all the wanted Toolkits are ticked in the Toolkits table . To install missing Toolkits, see info about the Maintenance tool.

The library is built by the steps:
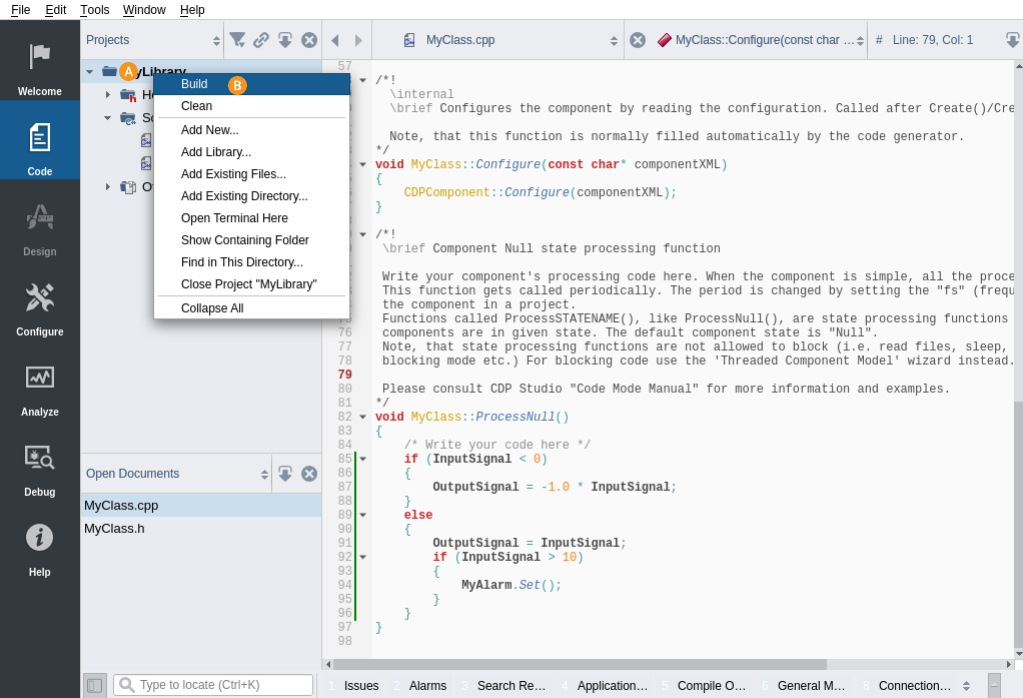
- Right click on library name in the Project tree.
- Select "Build" in the context menu.
Take care to build the library again after doing changes in the Toolkit selection. This will compile the library for all selected Toolkits, and deploy it to the correct toolkit in the deployments folder inside the CDPStudioWorkspace.

The Compile Output Pane

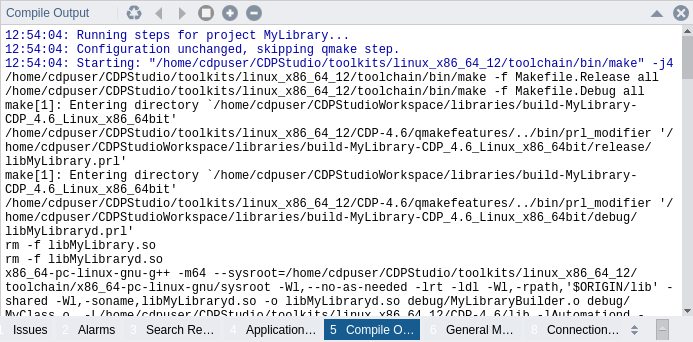
When you build your code, the Compile Output pane is populated with information from the compiler and linker. For each source-file in your project, the compiler from the Toolkit(s) selected will be invoked to generate machine-understandable code from the (C++) programming language used. Errors and warnings during this phase are called 'compile-time' errors and warnings. They typically inform you of what the compiler does not understand, such as misspelled or undefined variable/function names and structural errors (e.g. missing ';'). Double-clicking an error- or warning-line takes you to where the compiler found the issue. Compiler-warnings are notifications from the compiler; if you get warnings, you should always check your code to verify and clarify the code.
Successful compilation typically produces a linkable object-file. After everything is successfully compiled for the Toolkit, the Linker is invoked to create an executable by using information from all the object-files and libraries that the application has specified that it needs. If something fails at this stage, it is called a linker-error. Typical linker-errors are 'unresolved references', which means that the linker can not find something. This could for instance be caused by incorrect function or variable-names, mismatch between header-files and the header-files that the library or compilation unit used, or incorrect number or type of arguments for a function. It could also be caused by a missing library.
Note: The most typical linker-error in CDP Studio is caused by missing libraries, e.g. that the libraries are not compiled for the correct toolchain.
Use the Component in Your Project
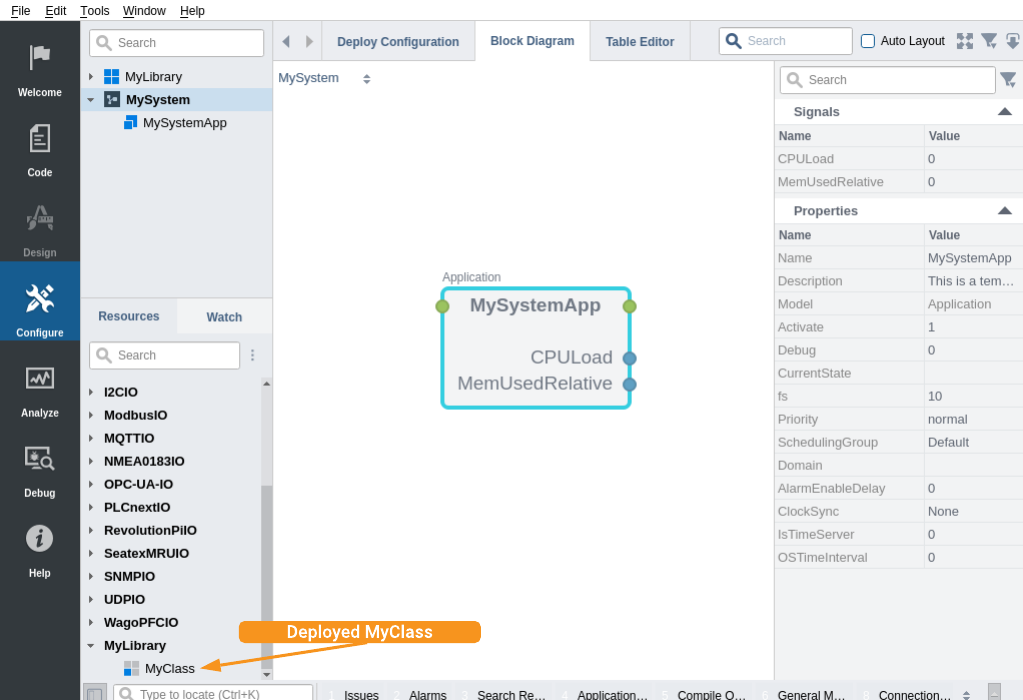
When the library has been successfully built, the library will appear in the Resource tree. Note that you need to be in Configure mode, and have a System where you have clicked at one Application to see the resources. To create a System, see How to Create a System. "MyClass" is now available as a resource inside "MyLibrary". If you want to add it to the application, right click on "MyClass" and select "Add" in the context menu, or double click on the MyClass.

MyClass in the Configure mode Resource tree.
Document Your Library
For more complex libraries it is recommended to add documentation to CDP Studio Help mode. See the Documenting Your Library Project manual for more details.
Testing Your Library
See Unit Testing manual for more details.
Get started with CDP Studio today
Let us help you take your great ideas and turn them into the products your customer will love.