Creating a Dynamic GUI for Showing Dialogs
Introduction
This example demonstrates how to create a GUI that will adapt its number of elements depending on the number of matching objects found in the application.
The example is similar to the Creating a Reusable GUI Dialog example, but while the GUI in that example is fixed to two buttons, the current GUI is dynamic and will adapt the number of buttons depending on the number of Sine components in the application. This is achieved using a dynamic widget named Node Container. Other features, like relative routing and UI dialogs, are documented in more detail in the other example.
Using the dynamic widgets in CDP Studio has the apparent advantage that the GUI won't have to be updated if the number of control blocks is changed, but it is also helpful when creating the GUI. For instance, if our current example included 100 Sine components and didn't use the dynamic approach, the buttons must be manually duplicated and updated with the correct target routing. Doing this operation 100 times would involve a substantial amount of clicking and typing, increasing the potential for errors.
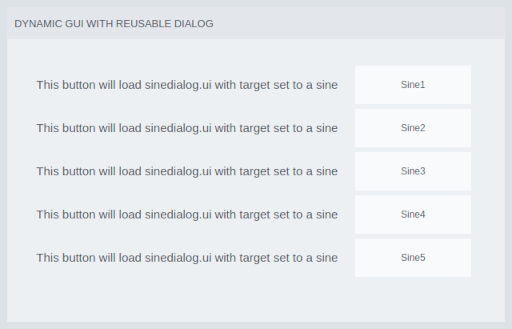
The example application comprises five Sine components. The GUI will feature an individual button for each component. When any of these buttons are clicked, a corresponding dialog will appear, allowing users to control the associated Sine component:
GUI Overview
The GUI consists of three separate UI files, mainwidget.ui, sinedialog.ui and row.ui.
The mainwidget.ui UI file contains the main window of the GUI. It includes a Node Container widget configured to load the row.ui UI file for every Sine model type it finds in the application. In the CDP Studio Design mode, the Node Container will not show the row.ui elements as this requires the application to run. To test how it will look in Design mode, the developer can force some nodes to show by using the forceNodes property.
The Node Container is not configured with any child widgets as we wanted to use the default flow layout. This layout will stack the buttons side by side if you adjust the GUI wide enough for the widgets to fit. To fix the widgets in a horizontal layout, the childContainerName property must be used as described in the Node Container class documentation.
The Node Container can contain any number of UI elements depending on how many matching objects are found on the target routing. Hence, it is important to place the Node Container in a Scroll Area to ensure that the GUI will always fit the buttons no matter the number of Sine components.
The row.ui file is opened by clicking the button to the upper left in CDP Studio Design mode. It was created as described in the Design Mode Manual selecting RoutingContainer as the form template. This enables us to set cdpTargetRouting and thus ensure that the routing completer in the property panel can list relative routings. There are only two routings in the file for showing the ShortName of the {Sine} in the text and on the button. As the button text does not have a separate property for routing, this is solved by creating a dynamic routing property, textRouting, as described in the Design Mode Manual.
Further, the button in row.ui is not configured with cdpTargetRouting as we want the dialog to use the target routing set by the Node Container. This means that the button will not override the cdpTargetRouting set in the dialog and we must ensure that it is set to empty.
The sinedialog.ui file contains widgets for displaying and controlling a Sine component. All routing properties are configured using relative routings to ensure that the dialog can show any Sine component, and the top-level cdpTargetRouting is set empty as there is no override in the button that will load it.
How to Run the Example
To run the example from CDP Studio, open Welcome mode and find it under Examples. Next, in Configure mode right-click on the system project and select Run & Connect. See the Running the Example Project tutorial for more information.
Get started with CDP Studio today
Let us help you take your great ideas and turn them into the products your customer will love.